Monday, 4 April 2016

GEO-Birthday Wishes

I'm always running short on birthday cards,
so it is always nice to have another added to my stash.

What was even more wonderful about this card was having my 13yo niece Grace come to visit with us for a few days and we spent precious creative time together today.  I will share her creation in a separate post so that she can enter some challenges too.


My card is 6 1/4" square.


The patterned paper panel (Kaisercraft - Lavendar Haze Collection - Lilac) was adhered to a square of black foam for dimension then adhered to the black (Kaisercraft Licorice textured cardstock) panel using Helmar 450 Quick Dry.

I stamped "birthday" from the Winnie & Walter - A Tree For All Seasons Stamp Set on a sheet of vellum with black pigment ink then heat embossed with WOW! Clear embossing powder then cut a banner that would fit both the Winnie & Walter In A Word Happy cutaway and the embossed "birthday".  Unfortunately vellum was a little too sheer to mute the busy background and it was difficult to see the sentiment clearly, so I cut another pennant out of Kaisercraft Pistachio textured cardstock.  The happy and Pretty Pink Posh Sparkling Clear sequins were adhered to the vellum with Tombow Mono Multi Liquid Adhesive, then I applied tiny dollops of Tombow Mono Multi on the underside of the vellum under the "happy" and sequins to secure it to the Pistachio cardstock.

The sentiment banner looked too flat when I first adhered it to the card front, so I quickly pulled it away (YAY, the Helmar 450 Quick Dry was still liquid) then I cut a smaller white foam pennant to add some extra dimension.

I adhered some more PPP Sparkling Clear sequins to the patterned paper panel too.


Ingredients:
Kaisercraft 12x12 patterned paper - Lavendar Haze Collection - Lilac
Kaisercraft Textured Cardstock - Pistachio
Kaisercraft Textured Cardstock - Licorice
Fundamentals - Plain Vellum
Winnie & Walter - In A Word - HAPPY cutaway
WOW! - Clear Embossing Powder
Pretty Pink Posh - Sparkling Clear Sequins - 4mm, 6mm and 8mm


I had several challenges in mind while I was creating this card and I'm going to enter it in the following challenges.

~~~*~~~*~~~
Here is the magazine cover to INSPIRE and there is an added TWIST this week, the project must include at least one stamp.
Papercrafting Challenge: Magazine Mondays - Week 138 Inspiration Piece (image)
I was inspired by the colours and patterns of the background against the POP of black.
How lucky was I to have THE PERFECT PAPER in my stash?!?!?
I combined a stamp with my diecut for the sentiment.
The added bonus is that I have this movie ready and waiting to watch again :)

~~~*~~~*~~~
share the love graphic pinkfresh
lydia_DSC07429  gayatri_Home Sweet Home card  kate_IMG_6983
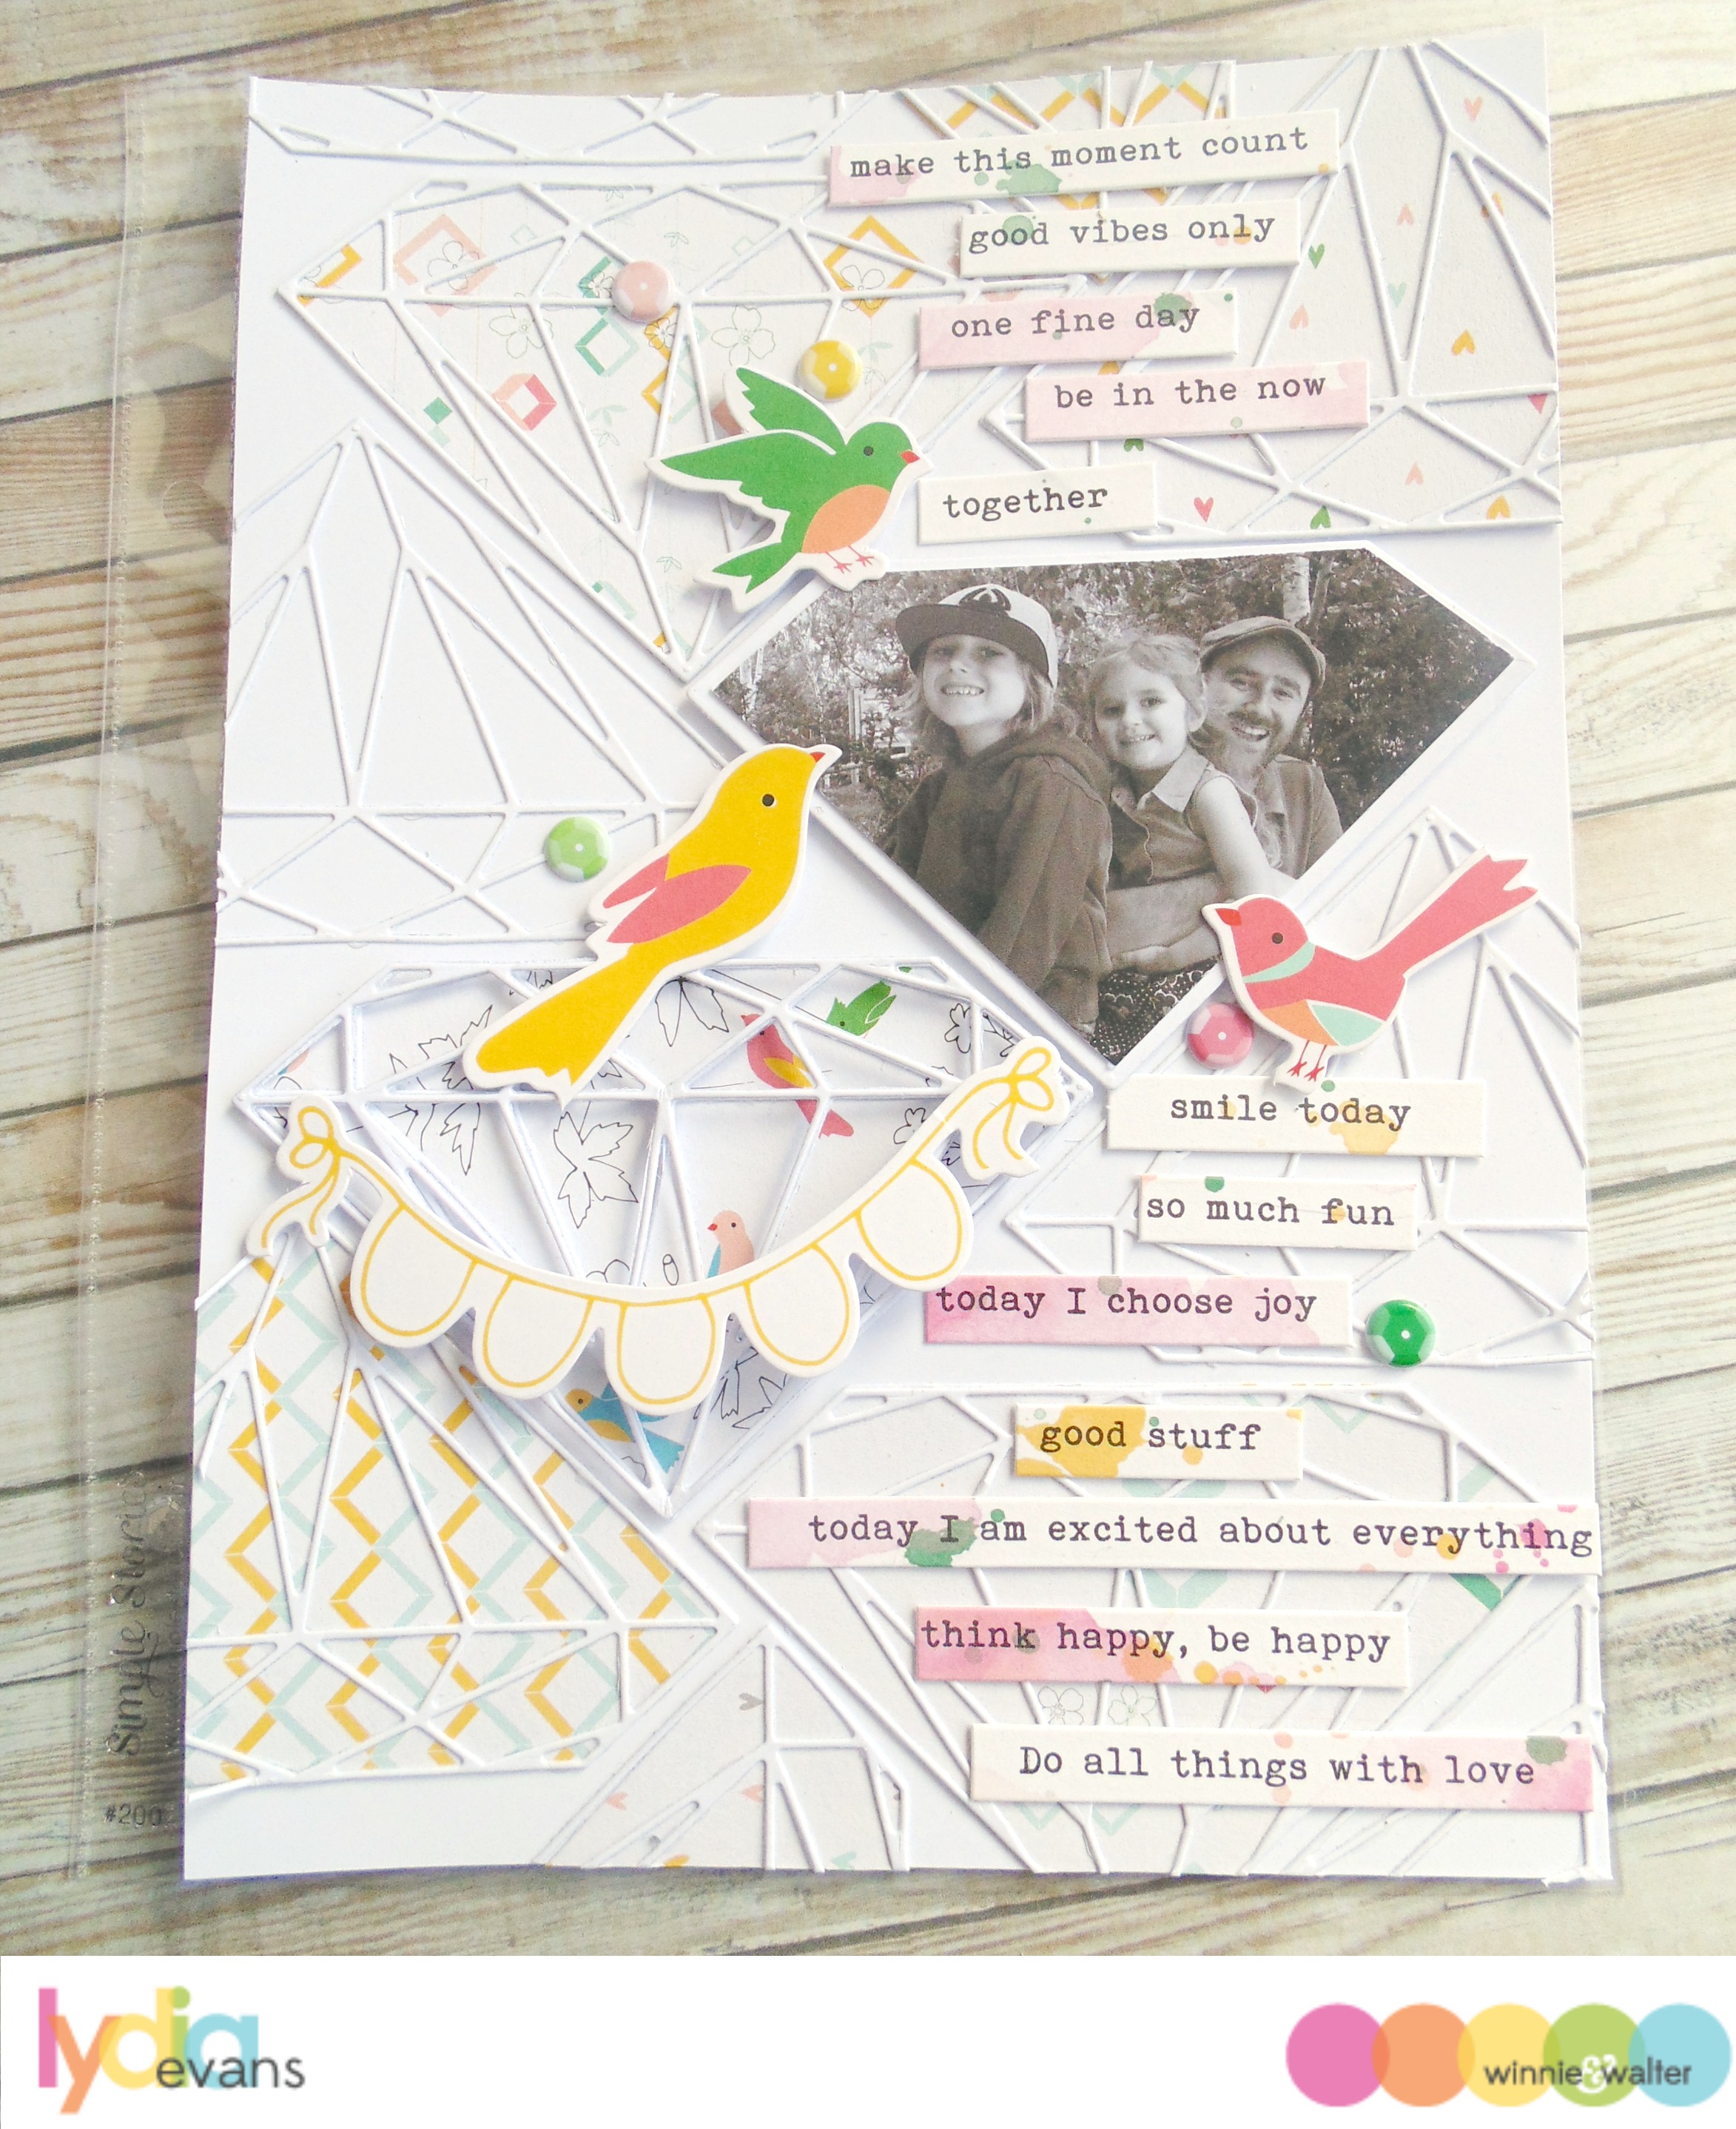
I was inspired by the geometric design of the fabulous facets in the background of Lydia's lovely layout from Day-3. 
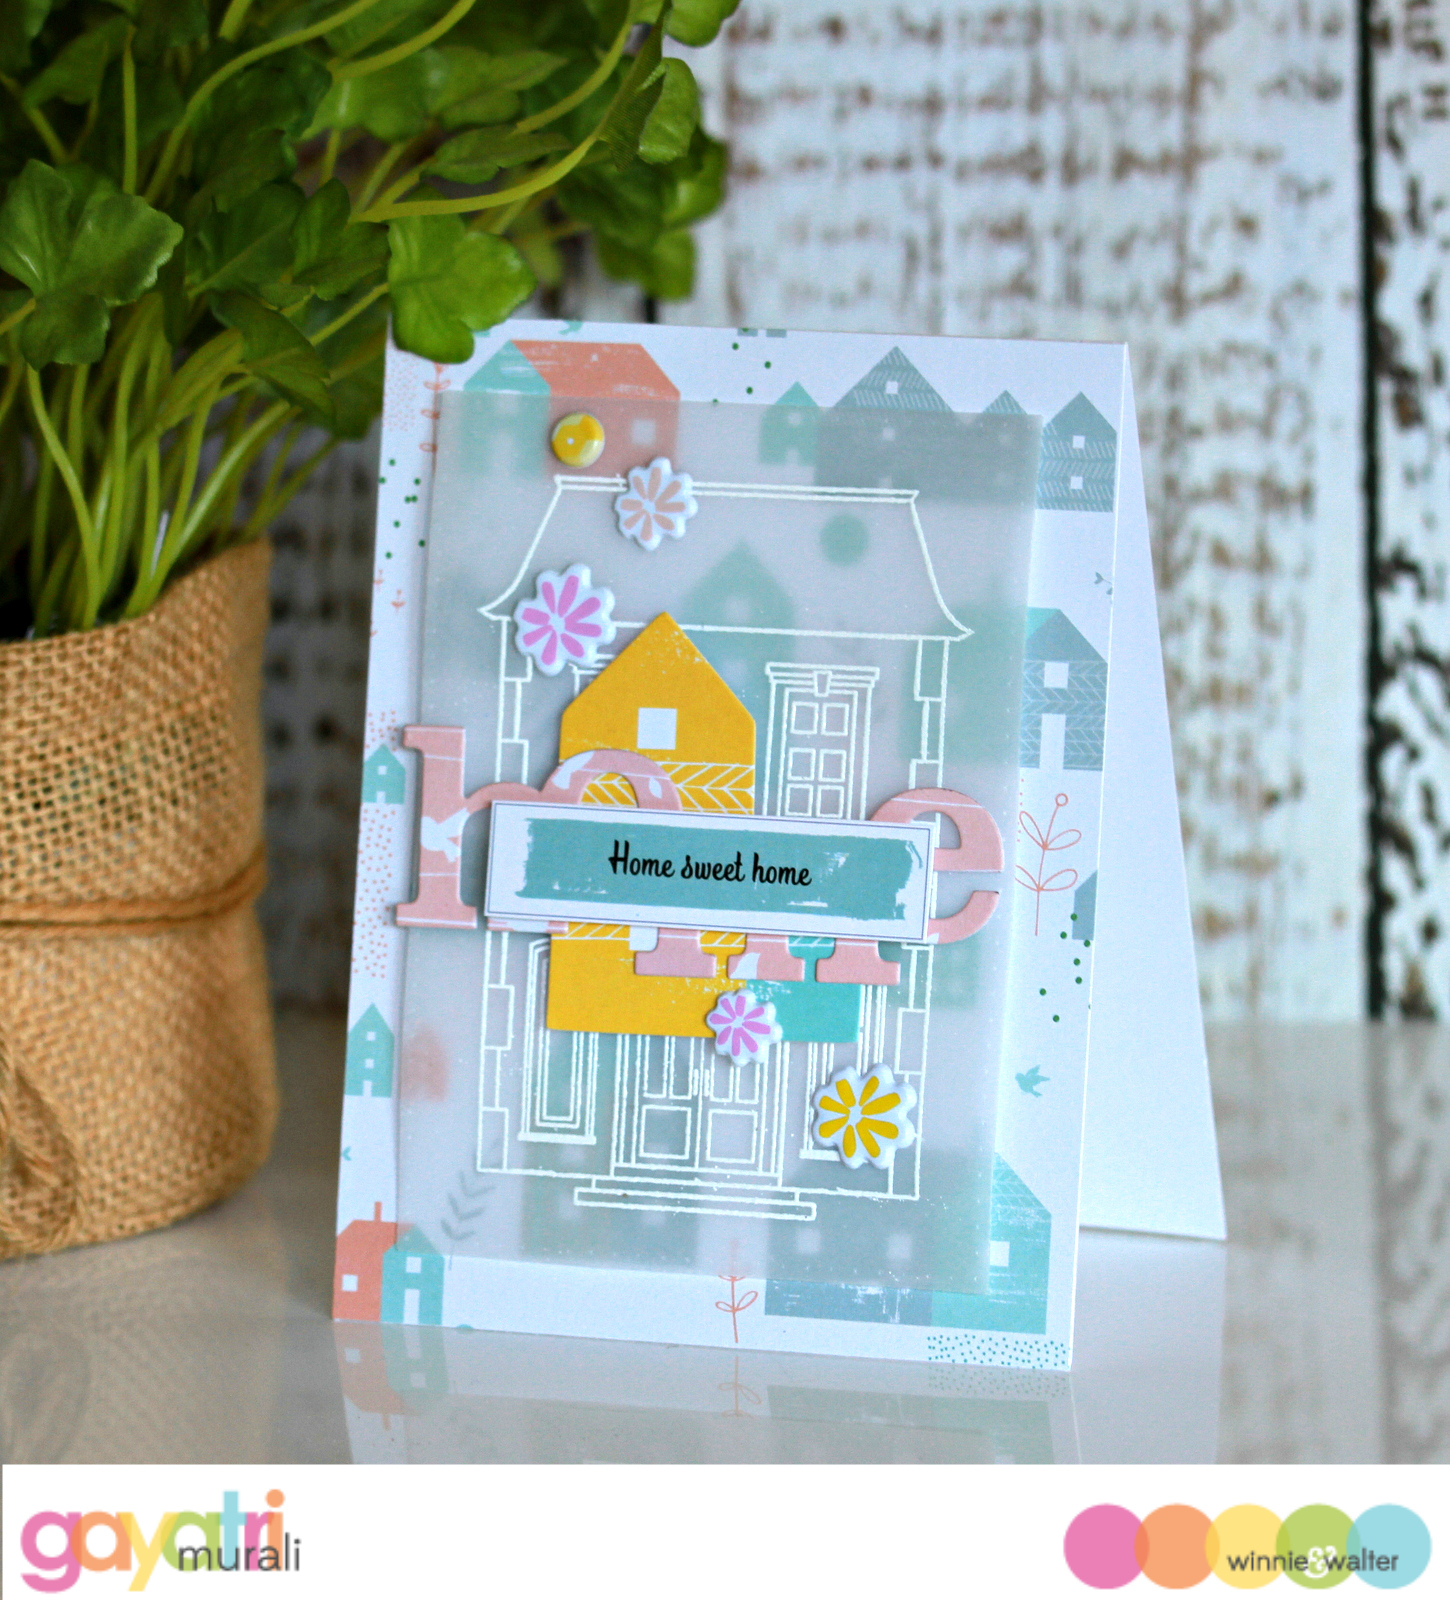
I was inspired by the soft colours, stamped vellum panel and mix of die cut & stamped sentiments of Gayatri's "home sweet home" card from Day-4
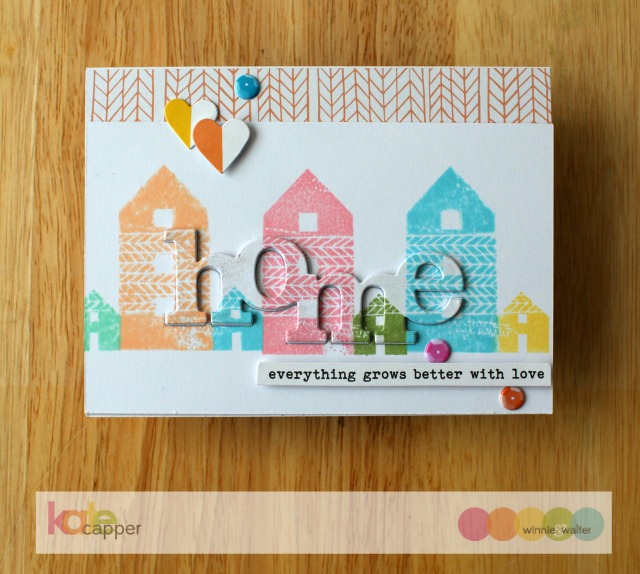
I was inspired by the geometric patterns, soft colours and combination of die cut & stamped sentiment of Kate's card from Day-5

~~~*~~~*~~~
Grab Our Badge!

~~~*~~~*~~~
Use acetate, vellum or anything you can think of that is a little transparent or you can use your imagination and think of a different meaning.
Simon Says Stamp Monday Challenge Blog  Simon Says Stamp Blog
I have used a vellum panel for my sentiment banner
and I have used lots of sparkling CLEAR sequins too.

~~~*~~~*~~~
Simon Says Stamp Wednesday Challenge Blog  Simon Says Stamp Blog

~~~*~~~*~~~
workitwedbanner
Simon Says Stamp Blog

  
The background paper includes pretty pastels.

~~~*~~~*~~~

PS - I confess that I cut the "wishes" from the W&W "birthday wishes" stamp.  It sure made it a lot easier to stamp without masking and they fit back together perfectly for when I want to stamp them together again.

Wednesday, 30 March 2016

Thinking of You

I have to confess that I'm still addicted to Distress Ink Lifting.
You can read all about it in my 1st post trying it HERE.

I got caught out a few weeks ago, needing an unexpected sympathy card and decided to make one to have on hand, ready and waiting.


I stamped my flower using Versamark and heat embossed it with white embossing powder.
The flower is the Large Peony 1 from The Ton.
I made a quick mask of the flower with copy paper, added a light smear of Tombow Mono Multi Liquid Glue and left it to dry.  The best thing about this adhesive is that if you leave it to dry it becomes repositionable.  I positioned the flower mask in place, stamped the leaves and it peeled away easily when the stamping was finished.

I saturated the entire panel with Faded Jeans Distress Ink, making sure that it went in to all the edges then I inked it all over again and again, super saturating it.

I added water into each petal and leaf to "lift" the Distress Ink.
I added Worn Lipstick Distress Ink to each of the petals with my Zig Waterbrush and let it flood and blend.  I added Bundled Sage Distress Ink to the leaves then added a bit of contrast with a tiny dollop of Peeled Paint Distress Ink.
While it was still drying, I went over each petal and leaf with Clear Wink Of Stella to add some sparkle, it really makes the coloured panel pop.

Now comes confession time.
I had a bit of "flooding" out the right hand side of the flower.
  
Can you see it?
HORRIBLE right?!?!?!
I just couldn't use it on a card like it was, so I decided to fussy cut the coloured flower and leaves and add them to a new panel super saturated with Faded Jeans Distress Ink.
I added some Sparkling Clear Sequins (4mm & 6mm) from Pretty Pink Posh, adhered with Tombow Mono Multi Liquid Glue.
The sentiment is the Thinking of You Decorative Die by Kaisercraft.
I double heat embossed it with white WOW! embossing powder then adhered in place with Tombow Mono Multi Liquid Glue.
The matted front panel is 5" x 7", so I made a top folding card by cutting another purple panel, scored a 3/4" from the top then matted with a white panel the same as the front.  To make this super secure, I adhered the  front & back together on the flap using Helmar Acid Free Professional Glue.  It is a liquid adhesive that is great for strong bonding (even book binding) just be careful not to use too much as it can cause buckling.


Here is a close-up to show the colours and sparkle.


~~~*~~~*~~~

I am going to enter my card in the following challenges:

~~~*~~~*~~~
Simon Says Stamp Wednesday Challenge Blog
Simon Says - Come Rain or Shine
The challenge is to highlight rainy days, sunny days or both.
Simon Wednesday Challenge Blog  Simon Says Stamp
My flower has raindrops sparkling in the sunshine after the rains have ended.

~~~*~~~*~~~
The Season - The Ton
Color Palette Challenge for National Craft Month
The challenge is to create a project using The Ton stamps, anything goes, with the option to use the following color palette.  The Ton stamp must be the focal point of the project.
ton8  file-page1-2
My flower is the Large Peony 1 by The Ton and it is the feature in this CAS design.

~~~*~~~*~~~
WOW! March Challenge
The challenge is to use heat embossing or WOW! products.

#wowembossingpowder
Photobucket
I have used WOW! embossing powder to heat emboss the flower panel and the sentiment.

~~~*~~~*~~~

Saturday, 26 March 2016

Matching teacups ... Spring Coffee Lovers Style

My cards were created for the Spring Coffee Lovers Blog Hop
#SpringCLH
12661786_10208877635328742_1011373880191829209_n
The Blog Hop runs
from 6am Pacific Friday 18th March to 11:55pm Pacific Friday 25th March.

EVERYONE is invited to share a newly created SPRING themed project that includes coffee, tea &/or coffee inspired designs.  The link to where you share your creations is on the Spring Coffee Lovers Blog Hop post on the Coffee Loving Cardmakers Blog.  By linking your NEW project you are entered for the chance to win a SUPER Sponsor or FLASH Sponsor prize.  Winners will be announced on the Coffee Loving Cardmakers Blog Sunday 27th March.
EVERYONE is also encouraged to comment on all of the projects linked up for the hop too.

I hope you get inspired and join the caffeinated fun with fellow tea & coffee lovers.


I used my Silhouette Cameo to make this pair of cards.
The design is the "3 Piece Tea Cup Card" by Samantha Walker purchased from the Silhouette Design Store.
I enlarged the file so that I could insert gift cards inside, so with the handle, it is 7 1/2" wide and stands 4 1/2" tall.
I also flipped the file, so that I could have the cups with handles on opposite sides, just in case I give them to a couple ... they can be his and hers :)

This was my 1st time using this design, they're so quick and easy to make, very handy for a last minute Thank You, Hello, Get Well, even a Hug-In-A-Mug.
... I'm used to lots of layers and embellishments, so this CAS design is calling for some flowers & bling, maybe even a dangling teabag or sentiment tag.


The textured cardstock is from the American Crafts 100sheet value pack.
I thought the aqua and teal looked cheery and "springy", keeping with the Blog Hop theme.

Stacked Teacups . . . Spring Coffee Lovers Style

#SpringCLH
12661786_10208877635328742_1011373880191829209_n
The Blog Hop runs
from 6am Pacific Friday 18th March to 11:55pm Pacific Friday 25th March.

EVERYONE is invited to share a newly created SPRING themed project that includes coffee, tea &/or coffee inspired designs.  The link to where you share your creations is on the Spring Coffee Lovers Blog Hop post on the Coffee Loving Cardmakers Blog.  By linking your NEW project you are entered for the chance to win a SUPER Sponsor or FLASH Sponsor prize.  Winners will be announced on the Coffee Loving Cardmakers Blog Sunday 27th March.
EVERYONE is also encouraged to comment on all of the projects linked up for the hop too.

I hope you get inspired and join the caffeinated fun with fellow tea & coffee lovers.

I used my Silhouette Cameo to make this card.
The file "Sweet Teacups Card" by Sweet Afton is from the Silhouette Design Store.
As soon as I saw the dimension of the stacked teacups with the delicate butterfly and leaves tucked in at the top, I knew I had to make it for my parents.  They both enjoy their hot cups of tea in pretty china teacups and gardening, Mum even collects tiny ornamental cups & teapots.  UPDATE - I've already given this card away as an Easter card to some friends, so I will have to make another one for Mum & Dad :)

I enlarged the file, so the final card is 6" wide by 8 1/4" tall.
I confess that I didn't plan on it being so large, it was supposed to be 5x7".  I had already cut all the cups, saucer, teabag, butterfly and scalloped panel and started to see how they fitted together only to find that the scalloped panel & matting were too small, so I quickly re-sized the scalloped panel to be 5 1/2" x 7 3/4" and used a 12x12 sheet to make the card base.  I cut an extra scalloped panel to mat inside the card, apart from looking pretty, it gives some extra weight to the back to ensure it stands tall and not bow from the weight of all the embellishments on the front.

The patterned papers are from the Kaisercraft "Summer Breeze" 6 1/2" paper pad,
the textured cardstock from the American Crafts 100 sheet value pack,
the leaves are Kaisercraft "Vines" Decorative Dies.
Adhesives were Helmar 450 Quick Dry and Tombow Mono Multi Liquid Glue.
I unwound some twine and twisted 2 strands together to make the teabag string.


I wanted to make the cups all the same shape, so I cut a little backing piece for each one in vanilla cardstock, to match the scalloped panel.  It is 2 1/8" tall, 2 3/4" wide at the top, 1 1/2" wide at the base.  I adhered the cup "flaps" around the back of each one, giving them identical curve and it made it so much easier to assemble too.  The handles were attached 1/2" down from the top of the cup.


~~~*~~~*~~~
I've never made a card like this before and will definitely be making more.
I thought that this would only be able to be given by hand then thought what a lovely surprise it will be to open a box and find this inside.  I'm sure some strategic packing will keep it safe and secure, time will tell :)


PS - while I am still learning about electronic cutting with my Cameo, I have to let you know that this cut file by Sweet Afton cut like a dream, I was really impressed that there was no tearing.

~~~*~~~*~~~

I am going to enter my card in the following challenges:

~~~*~~~*~~~
Grab Our Badge!
The colours and design of my card remind me of Spring, especially with the butterfly and leaves in the top cup.  I have already given it to some friends for Easter and Norena was thrilled when she opened the gift bag and found it inside.

~~~*~~~*~~~
Simon Says Stamp Wednesday Challenge Blog
Simon Says - Come Rain or Shine
Simon Wednesday Challenge Blog
My card is the shine after the rains, all the plants are refreshed, butterflies are all-a-flutter and we can enjoy a lovely hot cuppa out (and maybe a cupcake) out in the garden.


~~~*~~~*~~~
Simon Says Stamp Monday Challenge Blog
The challenge title says it all and my card is ready to make three hot cuppas.


~~~*~~~*~~~
Simon Says Stamp Blog
Work It Wednesday February - use something floral
Simon Says Stamp Blog
My card has lots of floral papers and die cut leaves.

~~~*~~~*~~~
The challenge is to share a newly created SPRING themed project that includes coffee, tea &/or coffee inspired designs.
12661786_10208877635328742_1011373880191829209_n
  My papers are bright and cheery florals and the top cup is filled with leaves and a butterfly that remind me of a warm Spring day.

~~~*~~~*~~~

High Tea . . . Spring Coffee Lovers Style

My card was created for the Spring Coffee Lovers Blog Hop
#SpringCLH
12661786_10208877635328742_1011373880191829209_n
The Blog Hop runs
from 6am Pacific Friday 18th March to 11:55pm Pacific Friday 25th March.

EVERYONE is invited to share a newly created SPRING themed project that includes coffee, tea &/or coffee inspired designs.  The link to where you share your creations is on the Spring Coffee Lovers Blog Hop post on the Coffee Loving Cardmakers Blog.  By linking your NEW project you are entered for the chance to win a SUPER Sponsor or FLASH Sponsor prize.  Winners will be announced on the Coffee Loving Cardmakers Blog Sunday 27th March.
EVERYONE is also encouraged to comment on all of the projects linked up for the hop too.

I hope you get inspired and join the caffeinated fun with fellow tea & coffee lovers.


I used my Silhouette Cameo to make this card.
The design is the "Mug Of Tea Papercut Card" by Nic Squirrell purchased from the Silhouette Design Store.
I enlarged it to be 5 3/4" square.
It is quite a delicate design and I was impressed with how neatly it cut.
I gave the panel a good squish in my Big Shot to smooth down all the edges.

I haven't included a sentiment on this one yet, might leave it plain with a written message inside, I might layer a strip of vellum with a "hello" or "get well" on top.  It is nice to have a spare card in my stash, ready and waiting for when I need one.

Friday, 25 March 2016

It's time to hop on over to the Paper Smooches Blog

It's Pep Rally Week on the Paper Smooches Blog.
Kim and the DT are sharing fun and fabulous projects using the
two new stamp set and five new dies from the April 2016 release,
 
CREATIVE INSPIRATION

CRAFTY TEMPTATION

AND the chance to WIN
one of FOUR $25 Paper Smooches gift certificates too!!!
AWESOME!!!

Head on over to the
Paper Smooches Blog
and get hopping now,
GOOD LUCK :)

Here are some links to their store if you want to check out all the crafty delights they have to tempt and inspire: