Showing posts with label Kaisercraft. Show all posts

Wednesday, 5 August 2020

The First Dance

It's time for a new challenge with us on the

As always, the challenge is Anything Goes.

~~~*~~~*~~~

The sponsors for this challenge are:

No photo description available.
All Dressed Up

Image may contain: text that says "Four Free Bugaboo Images!"

~~~*~~~*~~~

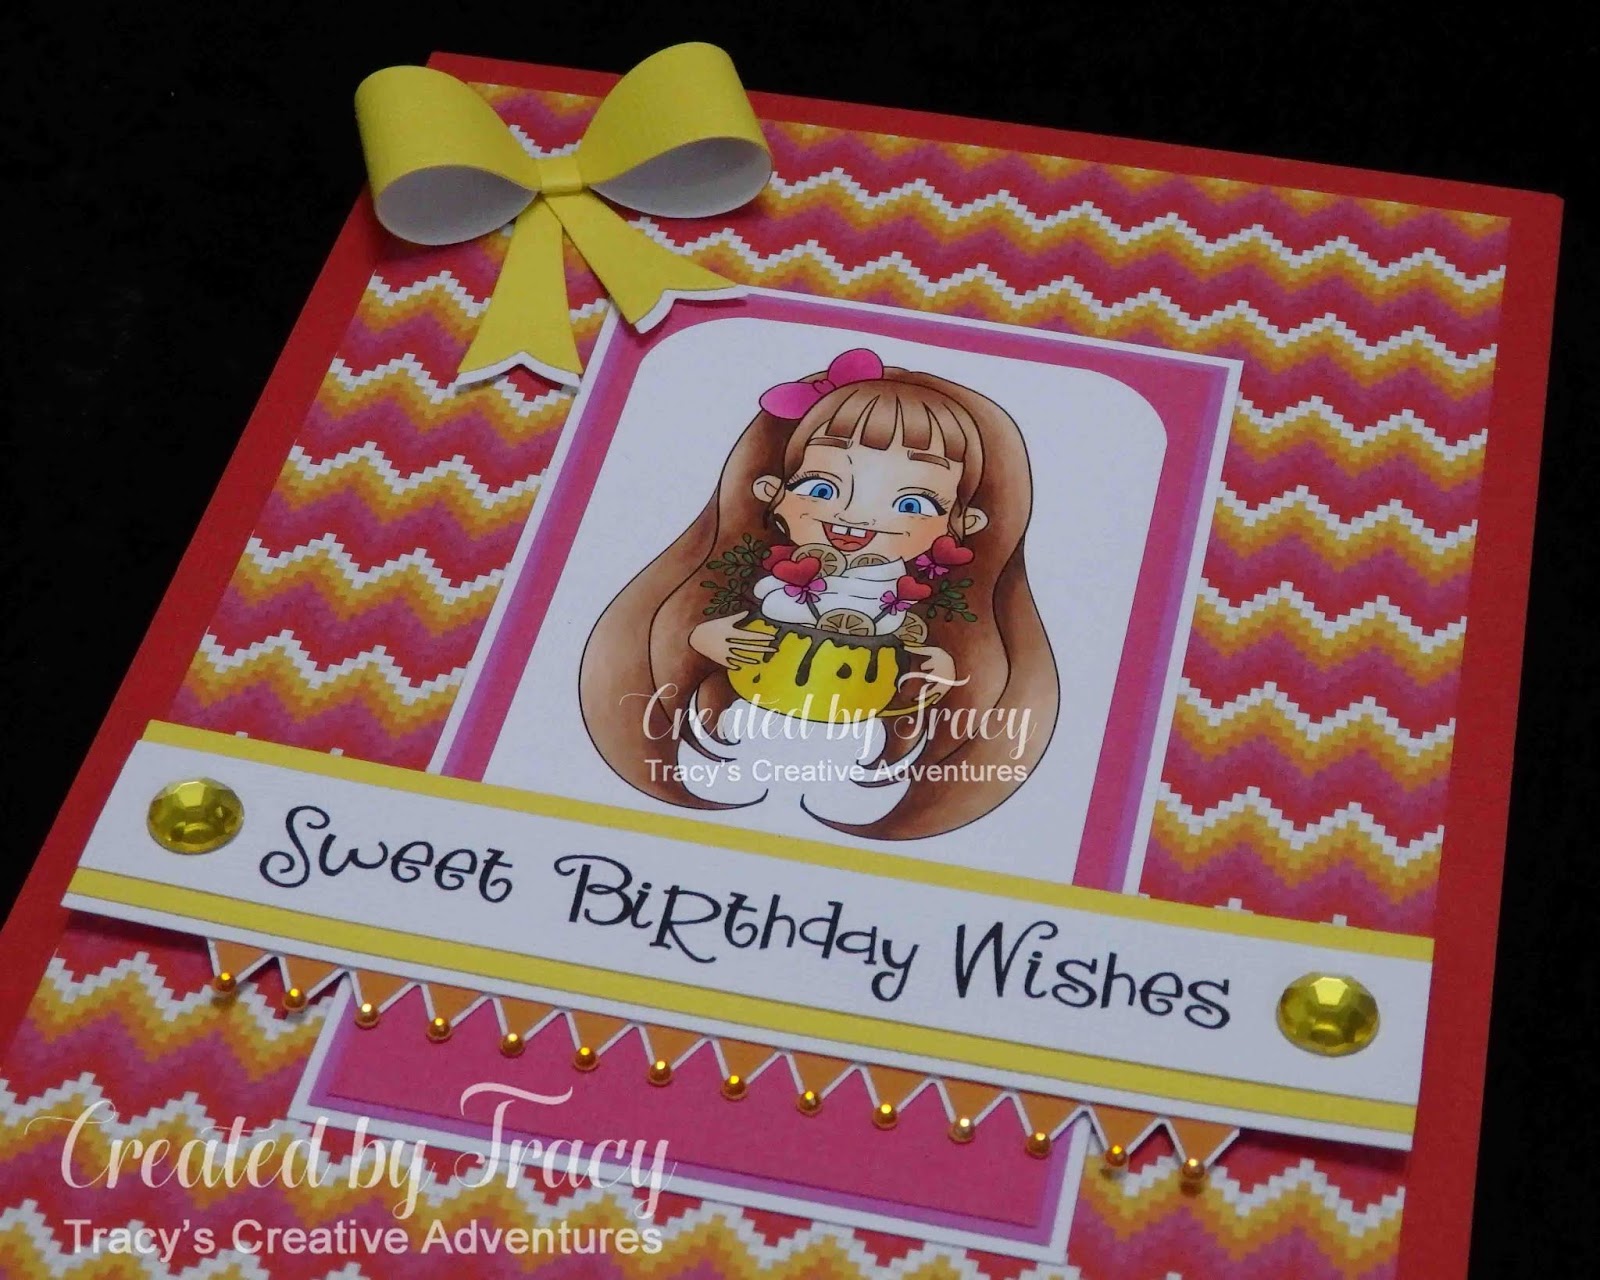
Today I have used The First Dance digital stamp from All Dressed Up,
one of our generous sponsors for this challenge.


I opened The First Dance digital stamp in Silhouette Studio and designed the layers for my card.  I printed the image on X-Press It blending card, heat set, cut with my Cameo then coloured the image and background with Copic markers.  The colours were chosen to suit some patterned paper and pearl flowers that had been put aside in my crafty stash as "too nice to use", funny how the perfect image comes along that inspires you to cut into the paper and open precious packets of treasures.  I cut the oval, circle and square matting layers from white cardstock and coloured with Copic markers to match the patterned paper layer.  I cut the square of patterned paper, made a card base then adhered all the layers in place with liquid adhesive.  I die cut several flourishes (details & link below), coloured with Copic markers and layered them together with the flowers.


~~~*~~~*~~~

NOW it's YOUR turn!

I hope that I have inspired you to get creative
and look forward to seeing your projects fill the gallery for
Penny's Challenge 477
on the
Penny's Paper-Crafty Challenge Blog

~~~*~~~*~~~

*** INGREDIENTS ***
All Dressed Up - digital stamp - The First Dance
X-Press It A4 Blending Card
Copic markers - image panel background - YR30 + "0"
Copic markers - skin - E0000-000-00-02
Copic markers - hair - girl - E30-31-33-35
Copic markers - hair - boy - E53-55-57-59
Copic markers - dress - C00-0 + "0"
Copic markers - dress bow, shoes & suit accents - RV91-93-97-99
Copic markers - suit - N1-2-3-4-7-9
Copic markers - shadows - T0-1-3
Copic markers - matting layer - silver - N3
Copic markers - matting layer & flourishes - gold - E84
Silhouette Cameo + own design ovals & circles
Sizzix Big Shot
Kaisercraft decorative dies - flourishes - 3D Flower
flowers - Blossoms by Vivaldi - Pearl Flower Soft Pink
Helmar 450 Quick Dry adhesive - to adhere the layers & flowers
Tombow Mono Multi Liquid Adhesive - to adhere the flourishes

~~~*~~~*~~~
Sending a big Thank You to All Dressed Up for supplying the digital stamp I used today and for being a sponsor for Challenge 477 on Penny's Paper-Crafty Challenge Blog
    
~~~*~~~*~~~
I am going to enter my card in the following challenges
~~~*~~~*~~~

A Gem Of A Challenge - Wk 16 – Anything Goes
A Perfect Time To Craft - August Challenge #8 – Anything Goes
All Dressed Up Challenges - July Challenge #107 - Anything ADU Goes
Carlin’s Challenge Blog - Challenge 25 – Anything Goes
Classic Design Challenge Blog - August Challenge #8 – Anything Goes
Colour Crazy Challenge - Week 29 – Anything Goes

Die Cut Divas Challenge Blog - August Challenge – Flowers
Digi Choosday Craft Challenge - Week 30 – Anything Goes
Ike’s World Challenges - Challenge 135 – T is for Three Of A Kind or Anything Goes
I have added three flowers with pearls
Jan’s Digi Stamps Challenge Blog - Challenge #15 – August Anything Goes
LeAnn’s World 101 Challenges - Challenge 29 - Anything Goes
Polkadoodles Craft Challenge - Wk 30 – Anything Goes
The Paper Shelter - Summer Break – Anything Goes
Through The Craft Room Door - TTCRD Anything Goes 4th August
Time Out Challenges - Challenge #167 – Inspired By Words

Wednesday, 22 July 2020

Butterfly Birthday Wishes

It's time for a new challenge with us on the
As always, the challenge is Anything Goes.

~~~*~~~*~~~

The sponsors for this challenge are:
Fred She Said Digital Designs


~~~*~~~*~~~

Today I have used the SwallowTail Butterfly digital stamp by Fred She Said Digital Designs to make a pair of shaker cards.  This digital stamp set comes with a combination of black & white and pre-coloured images.  I have used the pre-coloured SwallowTail Butterfly digital stamp to try a new-to-me shaker card technique.


My cards started on my Silhouette Studio design mat.  I opened the pre-coloured SwallowTail Butterfly digital stamp and a pretty blue digital watercolour paper.  I confess, I printed a bundle of these butterflies, fussy cut each one, carefully inked the outer edges then decided on a different card design, so my kaleidoscope of butterflies (yes, I looked it up) have been set aside for another day.  I added an offset to the butterfly, printed a sheet of them then cut with my Cameo.  I trimmed the digital paper to 4 3/4" x 6 1/2", added a 3 1/2" round window and sized the butterfly to fit neatly inside, printed then cut with my Cameo.  I added an 1/16" offset to make a matting layer for the window panel and cut it with my Cameo.  I matted a card base 5 1/8" x 6 7/8" to allow for a 1/8" border around the matted shaker panel.  I die cut sets of black and white alphas to make layered "HAPPY" and sets of a layered "Birthday" for both cards, adhering the layers together before adhering to the card fronts.
I used double-sided tape to adhere acetate to the shaker window then added foam around the back of the matted card front, carefully sealing around the edges of the window.  I went around the outer and inner edges of the foam with a black marker to match the matting layer.  The butterflies were adhered together with some clear jewellery bead thread between the layers along the middle body line.  The layered butterfly was secured in place with double-sided tape, with the length at the top allowing the butterfly to float down in the window but not to the bottom and the length at the bottom allowing the butterfly to float up to the top of the window ... sure hope this makes sense ... the idea is to allow the butterfly to flutter around the window without going upside down.  You can read all about it HEREin this fabulous tutorial by Jennifer McGuire.  I put some double-sided tape on top of the thread, cutting slightly longer, folding back and putting more tape on top, to ensure the thread doesn't work loose.  I had so much fun making a special shaker mix, combining cupped and flat sequins, seed beads and bugle beads in a range of blues, black and sparkling clear.  The photo below was my second attempt at making the card.  The first time I sealed it closed it was way too full, so I quickly peeled off the backing layer before the liquid adhesive had dried, luckily my "Quick Dry" wasn't too quick!  I tipped the shaker mix out, made a huge mess, eventually dividing all the different elements in half and sharing them between the two cards.  This time I sealed the card again and it was much better.


Before I sealed the second card, I decided to carefully pick out the beads and add more sparkling clear flat sequins to give the butterfly more room to float around the window.  If you look closely in the shaker windows above and below, you will be able to see the clear thread limiting the movement of the butterflies.


~~~*~~~*~~~

I also had the pleasure of working the Paper Nest Dolls


~~~*~~~*~~~

NOW it's YOUR turn!
I hope that I have inspired you to get creative
and look forward to seeing your projects fill the gallery for
Penny's Challenge 476
on the
Penny's Paper-Crafty Challenge Blog

~~~*~~~*~~~

*** INGREDIENTS ***
Fred She Said Digital Designs - digital stamp - SwallowTail Butterfly
digital paper - Watercolor Backgrounds
this was a freebie set of nine papers from The Hungry JPEG
Silhouette Cameo
Sizzix Big Shot
Kaisercraft - decorative dies - Alphabet Uppercase
Cottage Cutz - layered Happy Birthday dies
acetate -
X-Press It - foam tape - X-Press It - double-sided tape -
Helmar 450 Quick Dry adhesive - to adhere the layers
Tombow Mono Multi Liquid Adhesive - to adhere the alphas

~~~*~~~*~~~
Sending a big Thank You to for supplying the digital stamp I used today and for being a sponsor for Challenge 476Penny's Paper-Crafty Challenge Blog
    
~~~*~~~*~~~
I am going to enter my card in the following challenges

Wednesday, 8 July 2020

. . . making a list, checking it twice . . .

It's time for another challenge with us at the

This month we are letting our creative juices flow with
Crafty Gals Corner Challenges are monthly.
Each crafter may only submit 3 projects per challenge.

~~~*~~~*~~~


Colour of Love - Prize ~ 3 Digital Images


Cute as a Button - Prize ~ 2 Digital Images

Morgan's Art World - Prize ~ 3 Digital Images used by the DT

~~~*~~~*~~~

Today I have used the delightful Checking the List Elf digital stamp from Cute As A Button, two of our generous sponsors this month, to make three cards.

~~~*~~~*~~~

My first card uses the Flower Petals digital stamp from Colour Of Love.
FULL details can be found HERE or by clicking on the image below.


~~~*~~~*~~~

THIS POSTther two cards using the
Checking the List Elf digital stamp from Cute As A Button.


My pair of cards started on my Silhouette Studio design mat.  I opened the image and a cut file for the card design (details and link below).  I enlarged the card base (as well as the associated mechanism and layers) to make a 5 3/4" tall card.  I added an extra layer to the front of the card and sized the image to fit.  I created a sentiment for the front (and inside) of the card (font details and links below), printed the front panel on X-Press It blending card, cut with Silhouette Cameo, heat set and coloured with Copic markers.  I used the Cameo to cut the card base, mechanism and layers.  As mentioned earlier, I added a sentiment to the inside matting panels, so I printed them on textured cardstock and cut with the Cameo.  I used a combination of liquid adhesives (details below) to adhere all the layers.  I die cut some holly leaves and coloured them with markers to match the image.  I used markers to colour sparkling clear rhinestones.  The holly leaves and berries were adhered to the card front and the tiny red rhinestones adhered over the berries at the end of the elf's cap, for more contrast against the cap.

Here are my finished cards.  The elf looks so cute while checking the list.


When you open the card, the fancy folds go in to action
and the fun surprise inside pops out.


Here is what the folded mechanism looks like as the card opens


~~~*~~~*~~~

*** INGREDIENTS ***
Cute As A Button - digital stamp - Checking the List Elf
X-Press It A4 Blending Card
Copic markers - skin - E0000-000-00-02
Copic markers - eyes - E33-35-37
Copic markers - hair - E30-31-33-35
Copic markers - clothes - R22-24-27 + BG11-13-53-57
Copic markers - wings - BG10-11-13-53
Copic markers - leafy list - YG01-03-25-17
Copic markers - bell - Y11-15 + YR23-24
Copic markers - holly leaves & berries - YG17-67 + R22-24-27
Copic markers - hammer - E35-37 + E74-77-79
Copic markers - feather - C1 - BG10-53-57
Copic markers - shadow - W00-0-1-3-5
Copic markers - die cut holly leaves - YG25-17-67
Copic markers - rhinestones - R27
Kaisercraft weave cardstock - Capri + Crimson + Snow + Coal
Silhouette Cameo
Silhouette Design Store - Design ID #308899
Twist Pop Card - Santa List by Lori Whitlock
sentiment font "making a list" + "Have you been" - Lily Bloom Regular
this was included in a free font bundle from The Hungry JPEG
sentiment font "checking it twice" + "?" - Australian Script - Font Bundles
Sizzix Big Shot
Little B - Holiday die set - holly leaves - 
sparkling clear rhinestones - 
Helmar 450 Quick Dry adhesive - to adhere the layers
Tombow Mono Multi Liquid Adhesive - to adhere the twine & bows

~~~*~~~*~~~

NOW it's YOUR turn!

I hope that I have inspired you to get creative
and look forward to seeing your projects fill the gallery for
Crafty Gals Corner Challenges are monthly.
Each crafter may only submit 3 projects per challenge.

~~~*~~~*~~~
Sending a big Thank You to Cute As A Button for supplying the digital stamps I used today and for being generous sponsors for Challenge #209 - Fantasy WorldCrafty Gals Corner.
    
~~~*~~~*~~~
I am going to enter my card in the following challenges
~~~*~~~*~~~


Monday, 20 April 2020

Every Dream Begins With A Wish . . .

Today I am thrilled to be
Guest Designer
on the

HERE is the first challenge post and HERE is the reminder post


~~~*~~~*~~~

The sponsors for this challenge are:
   
LeAnn's World 101             Hetty Clare     
~~~*~~~*~~~

Today I have used the Cindy digital stamp from LeAnn's World 101one of the generous sponsors, to make a birthday card.  I thought it would be fun to make some magic happen with this sweet Cindy "Cinderella" image by combining it with some shimmering gold foiling, pretty patterned paper, a flourished sentiment, a touch of sparkle and a special message inside.


I designed my card in Silhouette Studio.  I combined the image with a quote (details & links below), adding some extra stars to the image panel so that the two panels would coordinate.  I printed the image on X-Press It blending card, heat set, cut to size (3.9") with my Cameo then coloured with Copic markers.  I used my Cameo to cut a circle (4.15") out of cardstock to mat the image panel.   I printed the sentiment panel and manually trimmed to size, matting with the same cardstock, trimming to a 1/8" border with a Perfect Layers Ruler.  I used a fancy font (details & link below) and an image of a dancing princess (details & link belowto create a sentiment panel for inside the card, printed on smooth white cardstock, trimmed to size, matted with cardstock, trimming to a 1/8" border with a Perfect Layers Ruler.  I used an A4 panel of heavy smooth white cardstock to make the top folding card base, trimming it to 7 7/8" wide x 5 7/8" high.  I matted the card front with pretty patterned paper, the golden foil accents perfect for a princess.  I adhered the matted image and sentiment panels in place with liquid adhesive.  I used the same adhesive to secure the paper roses in place, adding some sparkle to the petals with Stardust Stickles.


Lucky last came the sentiment panel for inside the card
. . . Cindy in now a Princess.


I could not resist, here are some more photos ...
click on the images to see the detail in full screen


NOW it's YOUR turn!

I hope that I have inspired you to get creative
and look forward to seeing your projects fill the gallery for

~~~*~~~*~~~

*** INGREDIENTS ***
LeAnn's World 101 digital stamp - Cindy
Copic markers - skin - E0000-000-00-02
Copic markers - lips - R22-24
Copic markers - eyes - B02-04
Copic markers - hair - E30-31-33-35-37
Copic markers - dress & shoes - G0000 + YG41-45
Copic markers - apron - E40-41-42-43
Copic markers - mop head - E51-53-43-47
Copic markers - mop handle - E23-25-27
Copic markers - mop bucket - E31-35-57-79 + C1-3-5-7
Copic markers - bubbles - B0000-000
Copic markers - stars - Y04-06-08
Copic markers - shadows - W0-1-3
Font Bundles - sentiment inside card - Dream Of Spring
this beautiful font is still available for FREE
Silhouette Design Store - quote - Design ID #263496
Every Dream Begins With A Wish by Sarah Hurley
Silhouette Design Store - dancing princess image - Design ID #298141
Princess Doodlebat by Lettering Delights
smooth A4 white cardstock - to make the card base
scoreboard and embossing stylus - to make the card base
Kaisercraft weave cardstock - Jade
Kaisercraft 12 x 12 patterned paper - With Love Collection - Thinking of You
Kaisercraft - paper blooms - Fairy Floss
Kaisercraft - mini paper blooms - Fairy Floss
Stardust Stickles - to add sparkle to the pink roses
Helmar 450 Quick Dry adhesive - to adhere the layers & flowers
foam squares - to adhere the image panel

~~~*~~~*~~~
Sending a big Thank You to LeAnn's World 101 for supplying the digital stamp I used today and to Claudia for inviting me to be Guest Designer on the Rabisco Challenge Blog.
    
~~~*~~~*~~~
I am going to enter my card in the following challenges (alphabetical order):
~~~*~~~*~~~

flowers + sparkle + sentiment
Catch The Bug Challenge Blog - Stella Says Sketch Challenge 808
I have rotated the sketch 90 degrees to make my card
   

Monday, 16 March 2020

Sweet Birthday Wishes

Today I am thrilled to be
Guest Designer
on the
for the mid-challenge reminder post for the
March 2020 - Challenge #03
click on the link above to see the reminder post projects, including mine
click on the image below to go the the first challenge post


~~~*~~~*~~~

The sponsors for this challenge are:
   
Little Blue Button Stamps             Hetty Clare
~~~*~~~*~~~

Today I have used the Sweet Tooth digital stamp from Little Blue Button Stamps,
one of our generous sponsors, to make a big A5 birthday card.


I printed the image on X-Press It blending card, heat set, trimmed to size (2 1/2" x 4 1/4") then coloured with Copic markers.  I used a fancy font to create the sentiment, printed on textured cardstock, trimmed to size and matted with yellow and white cardstock.  I used two A5 panels of heavy smooth white cardstock to make the top folding card base, scoring the back panel 1" from the top and used liquid adhesive to secure them together.  I matted the card front with crimson cardstock and added a panel of pretty patterned paper.  I used a corner rounding squeeze punch to round the top corners of the image panel and matted the panel with several different colours to match the patterned paper.  I decided to add a fun border to the sentiment panel and used an old favourite border punch.  I punched a white and orange strip, snipped the round ends off the white panel and adhered it under the orange strip with an offset to give it more contrast.  I adhered the matted image and sentiment panels in place and finished them off with some sparkling rhinestones.

Click on the images to see the detail in full screen


Lucky last came the dimensional bow.  I die cut the pieces twice, curved the loops, adhered the white inside the yellow then assembled, securing in place on the front of the card with liquid adhesive.  This was my first time "lining" a bow and I am thrilled with how it turned out, almost like a double-sided ribbon.


NOW it's YOUR turn!

I hope that I have inspired you to get creative
and look forward to seeing your projects fill the gallery for
March 2020 - Challenge #03

~~~*~~~*~~~

*** INGREDIENTS ***
Little Blue Button Stamps digital stamp - Sweet Tooth
Copic markers - skin - E0000-000-00-02
Copic markers - mouth & tongue - E13 + R14-17
Copic markers - eyes - B02-04
Copic markers - hair - E11-13-15-18 + bow - RV04-06-09
Copic markers - mug - Y06-08-18
Copic markers - dripping hot chocolate - E74-77-79
Copic markers - flowers - cream - E40-41
Copic markers - treats:
cherry & heart - R35-37-39 + bows - RV04-06-09
wafers - E30-31-33-35 + foliage - G07
Silhouette Design Store - sentiment font - Design ID #261611
ZP Macaroni Salad by ScrapNfonts
Fiskars squeeze punch - corner rounder
Fiskars border punch - Jenni Bowlin - Jester
smooth A5 white cardstock - 2 sheets to make the card base
scoreboard and embossing stylus - to make the card base
assorted textured/weave cardstock
Kaisercraft 12 x 12 patterned paper - Fiesta Collection - Jalapeno
Sizzix Big Shot
Winnie & Walter - Take A Bow Cutaways (no longer available)
assorted rhinestones
Helmar Acid Free Professional Glue - to adhere the top fold
Helmar 450 Quick Dry adhesive - to adhere the layers
Tombow Mono Multi Liquid Adhesive - to adhere the bow
foam squares - to adhere the sentiment panel

~~~*~~~*~~~
Sending a big Thank You to Little Blue Button Stamps for supplying the digital stamp I used today and to Claudia for inviting me to be Guest Designer on the Rabisco Challenge Blog.
    
~~~*~~~*~~~
I am going to enter my card in the following challenges (alphabetical order):