It's time for a new challenge with us on the

As always, the challenge is Anything Goes.
~~~*~~~*~~~
The sponsors for this challenge are:

The sponsors for this challenge are:

~~~*~~~*~~~
Today I have used the Floral Umbrella digital stamp set from Twinkle Lane Designs,
one of our generous sponsors for this challenge.
I opened the Floral Umbrella digital stamp in Silhouette Studio
to start planning my card designs.

My card is 5 1/2" wide x 3 3/4" high.
I used a purchased oval doily cut file (details below) to make this fancy shaped card. I added an offset layer to make the background. I made an extra two background layers, flipped one then welded them together to make a top folding card. I used the oval from the middle of the doily (made a copy and released the compound path) to make a matting layer then made an internal offset for the image panel. I sized the image to fit inside the oval. This digital stamp comes with a sentiment, so I "cut" the sentiment apart so that I could fit the phase neatly inside the oval panel. I printed the image panel on X-Press It blending card, heat set and cut with the Cameo then coloured with Copic markers. I cut the ornate matting panel, oval matting layer for the image panel and the card base with the Cameo. I used liquid adhesive to secure all the layers in place.

I love fancy shaped cards, especially when they stand up
without needing an easel to hold them.


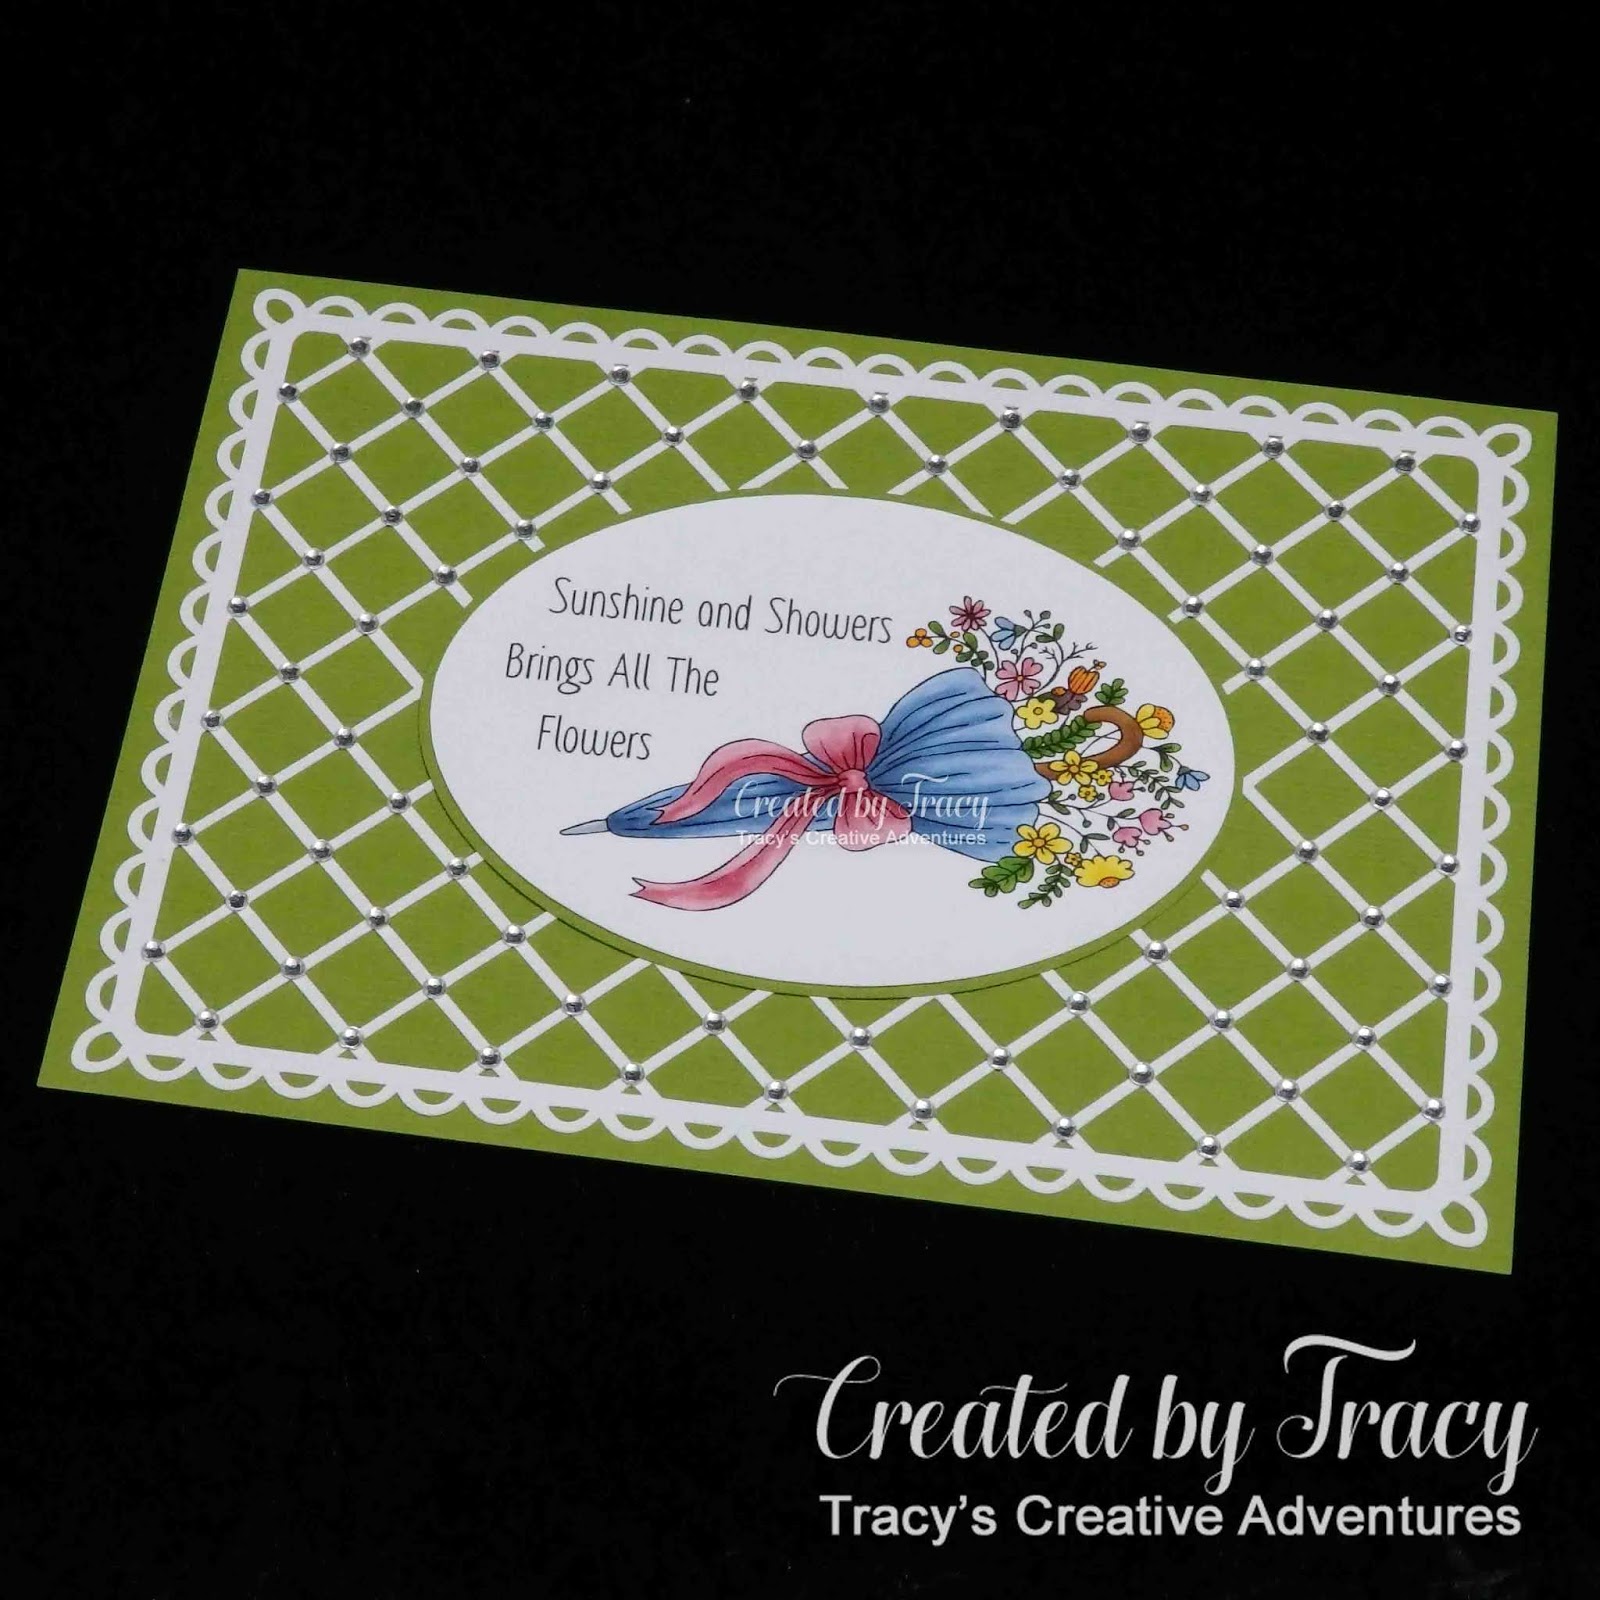
My other card is 7" x 5" and has a delicate lattice and lots of sparkling rhinestones.
Full details can be found HERE
or by clicking on the photo below.

~~~*~~~*~~~
one of our generous sponsors for this challenge.
I opened the Floral Umbrella digital stamp in Silhouette Studio
to start planning my card designs.

My card is 5 1/2" wide x 3 3/4" high.
I used a purchased oval doily cut file (details below) to make this fancy shaped card. I added an offset layer to make the background. I made an extra two background layers, flipped one then welded them together to make a top folding card. I used the oval from the middle of the doily (made a copy and released the compound path) to make a matting layer then made an internal offset for the image panel. I sized the image to fit inside the oval. This digital stamp comes with a sentiment, so I "cut" the sentiment apart so that I could fit the phase neatly inside the oval panel. I printed the image panel on X-Press It blending card, heat set and cut with the Cameo then coloured with Copic markers. I cut the ornate matting panel, oval matting layer for the image panel and the card base with the Cameo. I used liquid adhesive to secure all the layers in place.

I love fancy shaped cards, especially when they stand up
without needing an easel to hold them.


My other card is 7" x 5" and has a delicate lattice and lots of sparkling rhinestones.
Full details can be found HERE
or by clicking on the photo below.
~~~*~~~*~~~
NOW it's YOUR turn!
I hope that I have inspired you to get creative
and look forward to seeing your projects fill the gallery for
Penny's Challenge 479
on the
Penny's Paper-Crafty Challenge Blog
~~~*~~~*~~~
and look forward to seeing your projects fill the gallery for
Penny's Challenge 479
on the
Penny's Paper-Crafty Challenge Blog
~~~*~~~*~~~
*** INGREDIENTS ***
Twinkle Lane Designs - digital stamp - Floral Umbrella
Twinkle Lane Designs - digital stamp - Floral Umbrella
X-Press It A4 Blending Card
Copic markers - umbrella - B91-93-95-97
Copic markers - umbrella - bow - R81-83-85
Copic markers - umbrella - tip - C1-3-5
Copic markers - umbrella - handle - E35-37
Copic markers - flowers & foliage - YR04-07 + YG25-63-67 + B's & R's above
Silhouette Cameo
Silhouette Design Store Design ID #4104 - sorry no longer in store
Oval Doily - Jamie Koay - offset layer added
Helmar 450 Quick Dry adhesive - to adhere the layers
Tombow Mono Multi Liquid Adhesive - to adhere the delicate layers
~~~*~~~*~~~
Sending a big Thank You to Twinkle Lane Designs for supplying the digital stamp I used today and for being a sponsor for Challenge 479 on Penny's Paper-Crafty Challenge Blog.
~~~*~~~*~~~
I am going to enter my "sparkling lattice" card in the following challenges:
As You Like It Challenge - Favourite way to add ribbon (and why)
I confess, I'm a bit of a ribbon collector. I'm not so good at using them, so in reality I'm a ribbon hoarder. I find it a challenge to make pretty bows, so one of my favourite ways of using ribbon is to loop it and tie a knot with no wonky bow stress. My other favourite way to add ribbons is colouring digital images of ribbons, using my Copic markers to add shading and dimension like I have in this card. The added bonus of adding "coloured" ribbon is there is no bulk, perfect for mailing with no lumps and bumps to get caught in the sorting machines.
I confess, I'm a bit of a ribbon collector. I'm not so good at using them, so in reality I'm a ribbon hoarder. I find it a challenge to make pretty bows, so one of my favourite ways of using ribbon is to loop it and tie a knot with no wonky bow stress. My other favourite way to add ribbons is colouring digital images of ribbons, using my Copic markers to add shading and dimension like I have in this card. The added bonus of adding "coloured" ribbon is there is no bulk, perfect for mailing with no lumps and bumps to get caught in the sorting machines.
Crafty Sentiments Designs Challenge Blog - Anything Goes 1st September
~~~*~~~*~~~
2020 has been filled with lots of surprising challenges and sadly I have to announce that this is my last project with the talented team on the Penny's Paper-Crafty Challenge Blog. It has been a wonderful experience being part of this Design Team, I have appreciated the opportunity to create with you all and wish you all every happiness for the future. Thank You for all the fun and creative adventures.