Showing posts with label The Ton. Show all posts

Monday, 10 October 2016

A tasty birthday shaker

A tasty birthday shaker


... it wasn't so cute a while ago due to a shaker-cindent!
Don't ask me how it feels when your hand gets stuck on the super sticky foam just before you attach the backing ... all I will say is that hands, sequins and seed beads can be a real challenge to remove!

*** Ingredients ***
Winnie & Walter - stamp set - Sugar Rush
Memento Tuxedo Black Ink
Copic markers - Y13 YG45
Pretty Pink Posh - 4mm sequins - sparkling clear
The Ton - 4mm sequins - Lemon Chiffon
The Ton - 4mm sequins -  Yellow Belly
seed beads - clear and white
foam tape

~~~*~~~*~~~
I am going to enter my card in the following challenges:
~~~*~~~*~~~
I was inspired by the black-white-yellow colour combo and the layered cake.
~~~*~~~*~~~
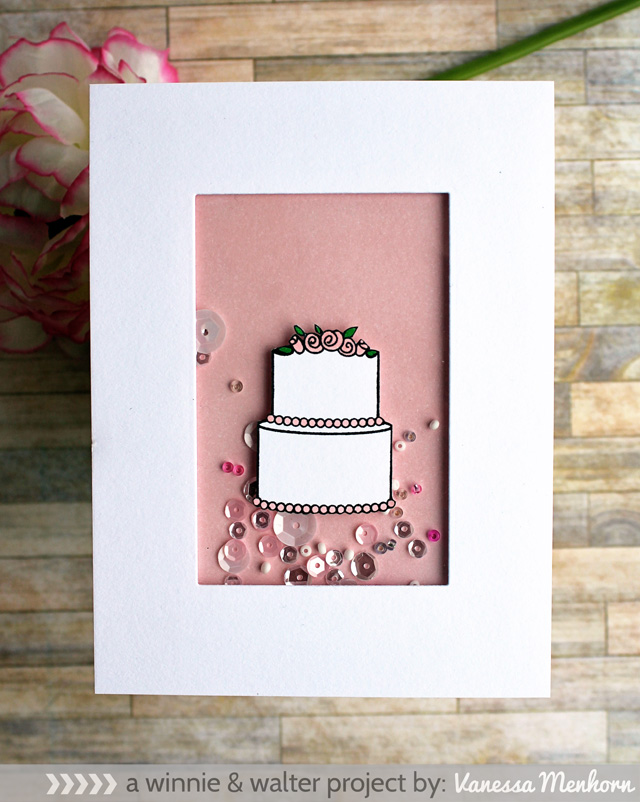
The challenge is to CASE a card from the W&W DT from any card found on the Winnie & Walter Blog.  I was inspired by this card by Vanessa Menhorn found HERE.
vanessa_cakeshaker
~~~*~~~*~~~
The challenge is to create a Clean & Simple card.

~~~*~~~*~~~
~~~*~~~*~~~
~~~*~~~*~~~
I have used white with black and yellow
~~~*~~~*~~~

Sunday, 22 May 2016

. . . distressed love

No, my love is not distressed!

My inky "love" card is though ... Distress Ink Lifting style.


 I don't think I will ever grow weary of this technique and confess they my eyes are peeled for stamps that would work well using it.  If you're interested in seeing some of my earlier projects using this technique, I have linked them at the end of this post.  I have also shared my "trials and tribulations" along the way, so I won't repeat all the detail of it again today, just summarise to say that I:
  • stamped the Large Peony 1 flower (from the The Ton) using Versamark Ink on smooth cardstock, heat embossed with clear glitter embossing powder, masked then stamped & heat embossed leaves. 
  • super saturated the panel of smooth cardstock with Faded Jeans Distress Ink
  • immediately "bleached" the petals & leaves with water using a waterbrush
  • immediately added Distess Inks into the individual petals and leaves, using Worn Lipstick for the petals, Bundled Sage & Peeled Paint for the leaves.  The ink was allowed to bleed and blend within each heat embossed "well"
  • applied Clear Wink Of Stella to the petals and leaves, it blended the colours a little more and added some extra sparkly pop
I trimmed the panel down and made a card base to allow for a 1/8" border (card 6 1/4" tall, 5" wide).  I adhered the panel to the card base using Helmar 450 Quick Dry.  It's a liquid adhesive that allows a little wriggle room and time to align everything perfectly, it dries clear and secures everything firmly, which is exactly what was needed with this panel.  All the inking, water and futher inking caused the panel to warp a bit but it sits perfectly flat with this adhesive.

I really like this image and colour combo and thought that a more subtle sentiment was called for, so I took a scrap that I trimmed from the inked panel and die cut out a little "love".  I layered two together (adhered using Tombow Mono Multi Glue), so that even though it is tone-on-tone, the dimension made it stand out better.

Here are a couple of close-ups to show the inky detail.


~~~*~~~ * ~~~ Ingredients ~~~*~~~*~~~
Clear glitter embossing powder
Distress Ink - Worn Lipstick
Distress Ink - Bundled Sage
Distress Ink - Peeled Paint
Zig Watercolor BrusH2O
Zig Wink Of Stella Clear Glitter Brush
Tombow Mono Multi Glue

~~~*~~~*~~~
I am going to enter my card in the following challenges:
~~~*~~~*~~~
Hiding In My Craft Room
HIMCR251
hidinginmycraftroom.com

~~~*~~~*~~~
Crafty Gals Corner
Grab Our Badge!

~~~*~~~*~~~
Glitter 'N' Sparkle Challenge Blog
Challenge #189 - Anything Goes
This Weeks Challenge

~~~*~~~*~~~
Sparkle N Sprinkle Creative Challenge Blog
May 2016 Challenge
The theme is Anything Goes as long as the project contains loose glitter, embossing powder or flocking.  I used Clear Glitter Embossing Powder to heat emboss my images.

To be considered for SNS Featured Artist you must us an SNS image, looking forward to getting mine inky real soon ...

~~~*~~~*~~~

You can read about my earlier Distress Ink Lifting projects by clicking on the images below.


Wednesday, 30 March 2016

Thinking of You

I have to confess that I'm still addicted to Distress Ink Lifting.
You can read all about it in my 1st post trying it HERE.

I got caught out a few weeks ago, needing an unexpected sympathy card and decided to make one to have on hand, ready and waiting.


I stamped my flower using Versamark and heat embossed it with white embossing powder.
The flower is the Large Peony 1 from The Ton.
I made a quick mask of the flower with copy paper, added a light smear of Tombow Mono Multi Liquid Glue and left it to dry.  The best thing about this adhesive is that if you leave it to dry it becomes repositionable.  I positioned the flower mask in place, stamped the leaves and it peeled away easily when the stamping was finished.

I saturated the entire panel with Faded Jeans Distress Ink, making sure that it went in to all the edges then I inked it all over again and again, super saturating it.

I added water into each petal and leaf to "lift" the Distress Ink.
I added Worn Lipstick Distress Ink to each of the petals with my Zig Waterbrush and let it flood and blend.  I added Bundled Sage Distress Ink to the leaves then added a bit of contrast with a tiny dollop of Peeled Paint Distress Ink.
While it was still drying, I went over each petal and leaf with Clear Wink Of Stella to add some sparkle, it really makes the coloured panel pop.

Now comes confession time.
I had a bit of "flooding" out the right hand side of the flower.
  
Can you see it?
HORRIBLE right?!?!?!
I just couldn't use it on a card like it was, so I decided to fussy cut the coloured flower and leaves and add them to a new panel super saturated with Faded Jeans Distress Ink.
I added some Sparkling Clear Sequins (4mm & 6mm) from Pretty Pink Posh, adhered with Tombow Mono Multi Liquid Glue.
The sentiment is the Thinking of You Decorative Die by Kaisercraft.
I double heat embossed it with white WOW! embossing powder then adhered in place with Tombow Mono Multi Liquid Glue.
The matted front panel is 5" x 7", so I made a top folding card by cutting another purple panel, scored a 3/4" from the top then matted with a white panel the same as the front.  To make this super secure, I adhered the  front & back together on the flap using Helmar Acid Free Professional Glue.  It is a liquid adhesive that is great for strong bonding (even book binding) just be careful not to use too much as it can cause buckling.


Here is a close-up to show the colours and sparkle.


~~~*~~~*~~~

I am going to enter my card in the following challenges:

~~~*~~~*~~~
Simon Says Stamp Wednesday Challenge Blog
Simon Says - Come Rain or Shine
The challenge is to highlight rainy days, sunny days or both.
Simon Wednesday Challenge Blog  Simon Says Stamp
My flower has raindrops sparkling in the sunshine after the rains have ended.

~~~*~~~*~~~
The Season - The Ton
Color Palette Challenge for National Craft Month
The challenge is to create a project using The Ton stamps, anything goes, with the option to use the following color palette.  The Ton stamp must be the focal point of the project.
ton8  file-page1-2
My flower is the Large Peony 1 by The Ton and it is the feature in this CAS design.

~~~*~~~*~~~
WOW! March Challenge
The challenge is to use heat embossing or WOW! products.

#wowembossingpowder
Photobucket
I have used WOW! embossing powder to heat emboss the flower panel and the sentiment.

~~~*~~~*~~~