Thursday 30 November 2023

Pretty Poinsettia - hope it's Merry


Day 30 - Do What You Love

I love making and giving Christmas. I love trying to make multiple cards with
little differences, so that they are still one-of-a-kind ... maybe two-of-a-kind.
Earlier today I made THIS pretty pair of Poinsettia cards using a delicate cut
file and the "Merry & bright" digital sentiment from Beccy’s Place.

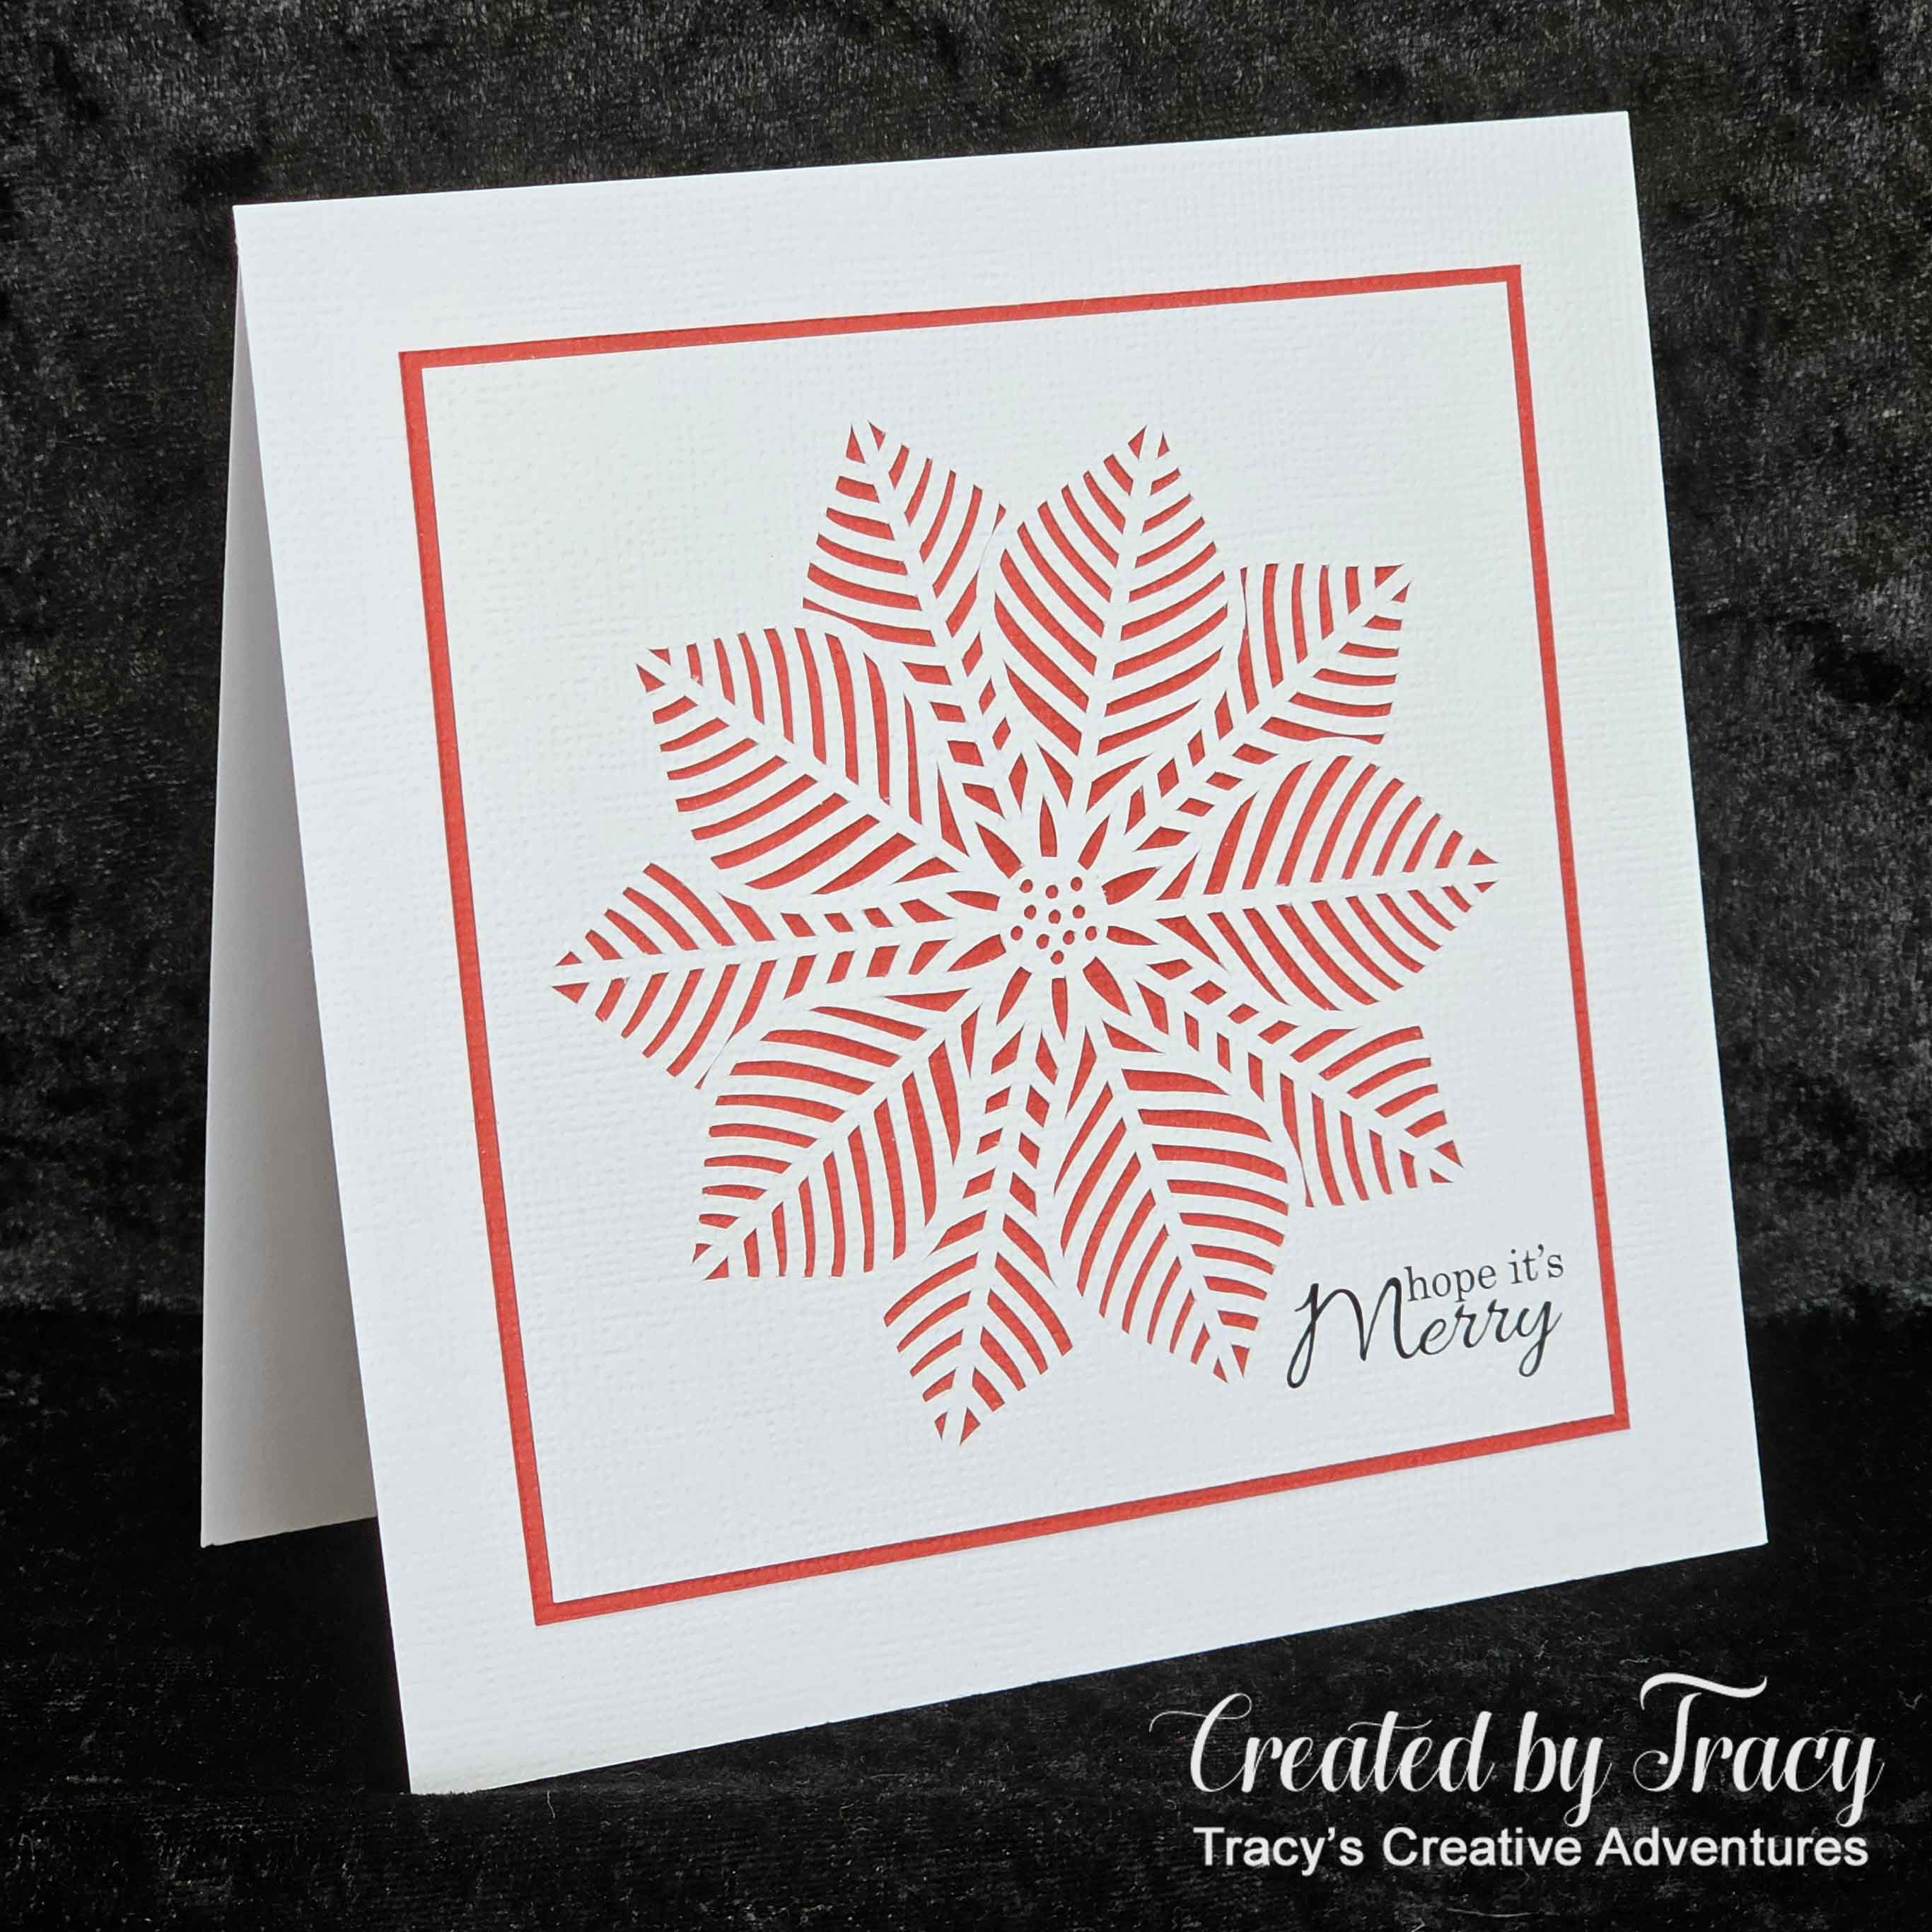
My latest cards use the same poinsettia cut file (details & link below)
but a different sentiment.  


The "hope it's Merry" digital sentiment from the Sing Joy digital stamp set by Beccy’s Place fits perfectly against the curve of the petals.  As with the earlier cards, I sized the poinsettia to fit on a 4 3/8" square panel, added the "hope it's Merry" digital sentiment and printed two panels on white textured cardstock then cut the poinsettia design from the panels using my Silhouette Cameo.  The panels were adhered to vibrant red textured cardstock then trimmed to a 1/8border with a Perfect Layers Ruler.  I made the 1/2card bases from 300gsm smooth white cardstock and matted the front with white textured cardstock.  I adhered the matted poinsettia panels to the matted card bases and soon had another pair of same-but-different modern merry poinsettia Christmas cards.


It's almost optical illusion with this design.  It looks like there are different shades of
red in the poinsettia but I assure it, it's a single layer of crimson red cardstock.


~~~*~~~*~~~
INGREDIENTS

"hope it's Merry" digital sentiment from the
Sing Joy digital stamp set by Beccy’s Place
Unfortunately this digital stamp set is no longer available but you can
view projects created with it on the Beccy's Place blog HERE
textured cardstock - to print & mat the image panel
Poinsettia cut file by Nic Squirrell
Silhouette Design Store - Design ID #307557
scoreboard & bone folder - to form the card bases
Perfect Layers Ruler - to trim matting layer
Helmar 450 Quick Dry - liquid adhesive to adhere layers
Tombow Mono Multi Adhesive - to adhere around delicate poinsettia veins

~~~*~~~*~~~
I have entered my cards in the


Day 30 - Do What You Love


It's no secret, I love to make cards, all sorts of cards,
so of course it's always a pleasure to make more.


Poinsettias hold special memories for me, especially at Christmastime, as they remind me of my Grandmother.  She had potted poinsettias dotted around the house every Christmas and it doesn't feel like Christmas if we don't have at least one in our home.

Most of my poinsettia projects in the past have included dimensional flowers, just like the lovely layers of the "real" ones.  This time I'm using a modern twist with a silhouette of the veined poinsettia petals cut from a card panel and the traditional red showing through from a matted layer underneath.

I opened the poinsettia cut file (details & link below) in Silhouette Studio, along with the "Merry & bright" digital sentiment from Golden Bell digital stamp set by Beccy’s Place.  I decided to use the poinsettia element from the cut file to make a panel to go on a 5 1/2" square card front.  I sized the poinsettia to fit on a 4 3/8" square panel, added the "Merry & bright" digital sentiment and printed two panels on white textured cardstock then cut the poinsettia design from the panels using my Silhouette Cameo.  The panels were adhered to vibrant red textured cardstock then trimmed to a 1/16border with a Perfect Layers Ruler.  I made the 1/2card bases from 300gsm smooth white cardstock and matted the front with white textured cardstock.  I adhered the matted poinsettia panels to the matted card bases and soon had a pair of modern merry poinsettia Christmas cards.


~~~*~~~*~~~
INGREDIENTS

"Merry & bright" digital sentiment from the
Golden Bell digital stamp set by Beccy’s Place
unfortunately this digital stamp set is no longer available but you can
view projects created with it on the Beccy's Place blog HERE
textured cardstock - to print & mat the image panel
Poinsettia cut file by Nic Squirrell
Silhouette Design Store - Design ID #307557
scoreboard & bone folder - to form the card bases
Perfect Layers Ruler - to trim matting layer
Helmar 450 Quick Dry - liquid adhesive to adhere layers
Tombow Mono Multi Adhesive - to adhere around delicate poinsettia veins

~~~*~~~*~~~
I have entered my card in the


T is for Triangles . . . blue triangles


T is for Triangles ...
... MORE Triangles, blue triangles


I shared a pair of Triangle-filled diamond-fold cards a few days ago.
I enjoyed them so much that I had to make some more,
this time with blue matting to enhance the ribbons
in the festive images and patterned paper.

HERE is my first pair of Triangle-filled diamond-fold cards

~~~*~~~*~~~


I used several elements from the Jingle Bell digital stamp set by Beccy’s Place, including the "Paper White" digital paper, the "Merry Little Christmas" digital sentiment and the "Bells with Bow and Pine", the "Bell Top Corner" and the "Bell Lower Corner" pre-coloured digital stamps to make these cards.  There are so many images and sentiments in this delightful set that it's impossible to choose just one, so it was only fitting that I got to combine so many in this card design.  I opened the digital paper, images and sentiment in Silhouette Studio, along with the Diamond Fold Card cut file (details below) and set up the panels for printing and cutting.  I added a matting layer to all the patterned pieces and sentiment to add some extra contrast.  Once all the pieces were printed and cut, I adhered the layers, burnished the folds and secured the belly band.


This really is a fancy fold, it looks different from every angle!


Here are the two different colours together,
my original green matted cards and today's blue matted cards.
Both look lovely with this pretty patterned paper.


~~~*~~~*~~~
INGREDIENTS
I used the following elements from the set:
Paper White – digital paper
Merry Little Christmas – digital sentiment
Bells with Bow and Pine – pre-coloured digital stamp
Bell Top Corner – pre-coloured digital stamp
Bell Lower Corner – pre-coloured digital stamp
Diamond Fold Card – cut file - by Lori Whitlock
- Silhouette Design Store - Design ID #78305
textured cardstock
bone folder - to form the folds
Helmar 450 Quick Dry - to adhere the layers
Tombow Mono Multi - to adhere the smaller panels

~~~*~~~*~~~
I have entered my cards in the

S is for Smashing Snowman, Same but . . .

. . . a little bit different!


S is for Smashing Snowman, Same-but-a-little-bit-different


How cute is this snowman smashing his way through the ice?
I love the thin pop of colour that matches the shades in the image.

No, you're not experiencing double-vision, you have seen him before.
I shared a pair of CAS cards using him HERE

and a matted card HERE

and I just had to make another one, using my favourite 1/16"
matting width, I do enjoy the delicate pop of colour it gives.
This cute “Smash Snowman” image is from Day 13 of the Christmas Craft Countdown event on the Craft With Sarah blog.  There was a group of “smash” images shared as part of this project.  The images were originally designed for sublimation printing on vinyl for ironing on t-shirts, canvas, fabric etc.  These PNG format images also work well with cardstock and I think they make for fun card designs.

I opened the Smash Snowman image in Silhouette Studio along with the "Warm Winter Wishes" digital sentiment from the Seasonal Window digital stamp set by Beccy’s Place It was like they were made for each other, as the font used for "winter" in the sentiment curved up perfectly to align with the bottom of the image ... I sure planned that well didn't I?  I sized the image and sentiment to fit on a 4 5/8" square panel and printed it on 300gsm smooth white cardstock, trimmed to size, matted on rich Merlot cardstock, trimmed to delicate 1/16" border with a Perfect Layers Ruler then adhered to a 5 1/2" square top folding card base.

SMASHING!


HERE is the CAS card made using this same image-sentiment combo.

and HERE is the card with the wider 1/8" matting layer.


It's impossible to choose a favourite, they're all so cute!


~~~*~~~*~~~
INGREDIENTS

"Warm Winter Wishes" digital sentiment from the
“Smash Snowman” image is from Day 13 of the Christmas Craft Countdown event
on the Craft With Sarah blog and can also be purchased from Sarah's Store
smooth white 300gsm cardstock
Merlot cardstock - to mat the image panel
scoreboard & bone folder - to form the card bases
Perfect Layers Ruler - to trim matting layer
Helmar 450 Quick Dry - liquid adhesive to adhere layers

~~~*~~~*~~~
I have entered my card in the


S is for Smashing Snowman


S is for Smashing Snowman


How cute is this snowman smashing his way through the ice?
I shared a pair of CAS cards using him HERE

This cute “Smash Snowman” image is from Day 13 of the Christmas Craft Countdown event on the Craft With Sarah blog.  There was a group of “smash” images shared as part of this project.  The images were originally designed for sublimation printing on vinyl for ironing on t-shirts, canvas, fabric etc.  These PNG format images also work well with cardstock and I think they make for fun card designs.

I opened the Smash Snowman image in Silhouette Studio along with the "Warm Winter Wishes" digital sentiment from the Seasonal Window digital stamp set by Beccy’s Place It was like they were made for each other, as the font used for "winter" in the sentiment curved up perfectly to align with the bottom of the image ... I sure planned that well didn't I?  I sized the image and sentiment to fit on a 4 5/8" square panel and printed it on 300gsm smooth white cardstock, trimmed to size, matted on rich Merlot cardstock, trimmed to 1/8" border with a Perfect Layers Ruler then adhered to a 5 1/2" square top folding card base.

SMASHING!


HERE are the CAS cards made using this same image-sentiment combo.


~~~*~~~*~~~
INGREDIENTS

"Warm Winter Wishes" digital sentiment from the
“Smash Snowman” image is from Day 13 of the Christmas Craft Countdown event
on the Craft With Sarah blog and can also be purchased from Sarah's Store
smooth white 300gsm cardstock
Merlot cardstock - to mat the image panel
scoreboard & bone folder - to form the card bases
Perfect Layers Ruler - to trim matting layer
Helmar 450 Quick Dry - liquid adhesive to adhere layers

~~~*~~~*~~~
I have entered my card in the