Thursday 31 October 2019

. . . MORE Slugs and Snails, no puppy dog tails

This is my second post for the day.
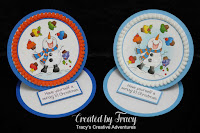
My first post detailed the lighter blue card below, this post is to feature the brown card.


Today is filled with slugs and snails, no puppy dog tails, just lots of fancy folds.
I have been wanting to use the super fun Slugs and Snails digital stamp set by Beccy's Place for ages and after seeing the fancy folds and interactive fun of a "waterfall card", I knew the right time had come.  This fancy fold card design allowed me to use all the images and sentiments in the set at once.

I opened the waterfall card cut file in Silhouette Studio then opened all the digital images and sentiments from the Slugs and Snails digital stamp set, pasting them on the design mat with the cut file.  I enlarged the waterfall card so that it would be 5" x 6 1/2" then sized the images and sentiments to fit on the feature panels of the "waterfall" strip.  I used the pre-coloured images and was lucky to have some perfectly coordinating digital papers in my stash (details and links below), so I sized the digital papers to fit the front panel of the cards.  I printed and cut the image and patterned paper panels then cut the other panels from matching cardstock, assembling to complete two waterfall cards with different looks.  Brads were used to secure the waterfall mechanism to the front of the cards.

Let's take a closer look at the card in action ... lots of photos ahead ...

Here is the closed card with the waterfall mechanism fully closed.


There are four image / sentiment panels and as the tab is pulled, the waterfall mechanism gradually reveals the panel underneath.  Sorry about the blue card photos, I struggled to photograph the brown one, so will try again in daylight ...


Here is a side view to show how the waterfall mechanism works.


I hope you enjoy these cards as much as I do.

~~~*~~~*~~~

*** INGREDIENTS ***
Beccy's Place - digital stamp - Slugs and Snails
weave cardstock
Imagine That Digistamp - digital paper - Argyles n Plaids
Blue n Brown Argyle 1 and Blues Diamonds
Silhouette Cameo
Silhouette Design Store - Design ID #42692
A2 Waterfall Card by Lori Whitlock - enlarged to 5” x 6 ½”
brads
Helmar 450 Quick Dry adhesive - to adhere the layers
Tombow Mono Multi Liquid Adhesive - to adhere the sentiment

~~~*~~~*~~~
I am going to enter my card in the following challenges:
~~~*~~~*~~~

As You Like It Challenge - Favourite Papers and why
At the moment I am loving the world of digital papers because I can get the perfect colour match and size the design to co-ordinate perfectly with the elements of my cards.  I confess, I'm giving my printer and Silhouette Cameo a workout creating my print & cut designs, loving every minute.
Beccy's Place - October Challenge - Anything Beccy's Place Goes
optional element: brads - I have used brads to secure the waterfall mechanism
Cardz 4 Galz - Challenge #108 - Something beginning with 'S'
my cards are filled with Slugs and Snails, just what little girls (& boys) love to play with
Creative Inspirations Challenge Blog - October Challenge – Masculine or Halloween/Autumn
the papers and images initially look masculine with the blues & browns and of course the slugs and snails are calling out to little (& not so little) boys.  I confess to being a tomboy growing up, so I think these are fun for girls too.

Slugs & Snails and Waterfall Folds

Today is filled with slugs and snails,
no puppy dog tails, just lots of fancy folds.

I have been wanting to use the super fun Slugs and Snails digital stamp set by Beccy's Place for ages and after seeing the fancy folds and interactive fun of a "waterfall card", I knew the right time had come.  This fancy fold card design allowed me to use all the images and sentiments in the set at once.

I opened the waterfall card cut file in Silhouette Studio then opened all the digital images and sentiments from the Slugs and Snails digital stamp set, pasting them on the design mat with the cut file.  I enlarged the waterfall card so that it would be 5" x 6 1/2" then sized the images and sentiments to fit on the feature panels of the "waterfall" strip.  I used the pre-coloured images and was lucky to have some perfectly coordinating digital papers in my stash (details and links below), so I sized the digital papers to fit the front panel of the cards.  I printed and cut the image and patterned paper panels then cut the other panels from matching cardstock, assembling to complete two waterfall cards with different looks.  Brads were used to secure the waterfall mechanism to the front of the cards.


Let's take a closer look at the card in action ... lots of photos ahead ...

Here is the closed card with the waterfall mechanism fully closed.


There are four image / sentiment panels and as the tab is pulled, the waterfall mechanism gradually reveals the panel underneath.


Here is a side view to show how the waterfall mechanism works.


I hope you enjoy these cards as much as I do.

~~~*~~~*~~~

*** INGREDIENTS ***
Beccy's Place - digital stamp - Slugs and Snails
weave cardstock
Imagine That Digistamp - digital paper - Argyles n Plaids
Blue n Brown Argyle 1 and Blues Diamonds
Silhouette Cameo
Silhouette Design Store - Design ID #42692
A2 Waterfall Card by Lori Whitlock - enlarged to 5” x 6 ½”
brads
Helmar 450 Quick Dry adhesive - to adhere the layers
Tombow Mono Multi Liquid Adhesive - to adhere the sentiment

~~~*~~~*~~~
I am going to enter my card in the following challenges:
~~~*~~~*~~~

As You Like It Challenge - Favourite Papers and why
At the moment I am loving the world of digital papers because I can get the perfect colour match and size the design to co-ordinate perfectly with the elements of my cards.  I confess, I'm giving my printer and Silhouette Cameo a workout creating my print & cut designs, loving every minute.
Beccy's Place - October Challenge - Anything Beccy's Place Goes
optional element: brads - I have used brads to secure the waterfall mechanism
Cardz 4 Galz - Challenge #108 - Something beginning with 'S'
my cards are filled with Slugs and Snails, just what little girls (& boys) love to play with
Crafty Sentiments Designs Challenge Blog - Fancy Folds Challenge
Creative Inspirations Challenge Blog - October Challenge – Masculine or Halloween/Autumn
the papers and images initially look masculine with the blues & browns and of course the slugs and snails are calling out to little (& not so little) boys.  I confess to being a tomboy growing up, so I think these are fun for girls too.

Wednesday 30 October 2019

Friendship Flowers from Jan's and Penny's

It's time for a new challenge with us on the
Penny's Challenge 454
As always, the challenge is Anything Goes.

~~~*~~~*~~~

The sponsor for this challenge is:


Jan’s Digi Stamps

~~~*~~~*~~~

Today I have used the Friendship Flowers digital stamp from Jan’s Digi Stamps,
our generous sponsor for this challenge.
I printed the image on X-Press It blending card, heat set then coloured with Copic markers.  I die cut the image panel then matted it three times.  I created a card base by scoring an A4 sheet of heavy smooth cardstock and matted it with patterned paper.  Three layered accent strips were cut from the same cardstock, along with a layered sentiment.  The panels were adhered in place with liquid adhesive and the card was finished off by adding some punched butterflies.


~~~*~~~*~~~

NOW it's YOUR turn!

I hope that I have inspired you to get creative
and look forward to seeing your projects fill the gallery for
Penny's Challenge 454
on the
Penny's Paper-Crafty Challenge Blog

~~~*~~~*~~~

*** INGREDIENTS ***
Jan’s Digi Stamps - digital stamp - Friendship Flowers
X-Press It A4 Blending Card
Copic markers - watering can - T1-3-5-7
Copic markers - leaves - YG03-17-67
Copic markers - flowers - assorted combinations of:
Y11-13-15-18
YR04-07-09-12-14-16-18
R20-21-22-24-27
RV00-02-04
Copic markers - shadowing - W00-1-3
weave cardstock
Kaisercraft - 12x12 patterned paper - Golden Grove Collection - Greenery
Sizzix Big Shot
nesting circles dies
happy birthday layering dies
Fiskars - butterfly punches
Helmar 450 Quick Dry adhesive - to adhere the layers
Tombow Mono Multi Liquid Adhesive - to adhere the sentiment & butterflies

~~~*~~~*~~~
Sending a big Thank You to Jan’s Digi Stamps for supplying the digital stamp I used today and for being a sponsor for Challenge 454 on Penny's Paper-Crafty Challenge Blog.
    
~~~*~~~*~~~
I am going to enter my card in the following challenges:

Wednesday 23 October 2019

Speeding By from Imagine That to Penny's

It's time for a new challenge with us on the
As always, the challenge is Anything Goes.

~~~*~~~*~~~

The sponsors for this challenge are:


~~~*~~~*~~~

I have used the Speeding By digital stamp set from Imagine That Digistamp,
one of our generous sponsors for this challenge, to make a fun birthday card.


I opened the image and sentiment in Silhouette Studio, sized them to fit on a 1/4" x 7 1/4" card.  I opened a racing flags cut file (details below) and added it to the image panel.  The image panel is 2 3/8" x 4 1/2".  I printed the image panel on X-Press It blending card and coloured with Copic markers.  I opened a fire flourish cut file (details below) and edited it to make a long layered sentiment strip (cut off the baseball and welded the flames to a long rectangle) to fit the sentiment, one of several that comes with the Speeding By digital stamp set.  The largest flame is just over 5 7/8" wide by just over 7/8" high.  I printed the sentiment panel on orange textured cardstock then cut with the Silhouette Cameo.  I cut the red and yellow flame layers to mat under the sentiment with the Silhouette Cameo too.  I matted the image panel with black cardstock, trimmed to a 1/16" border using the Perfect Layers ruler.  I cut some strips from the red, orange and yellow cardstock used for the flaming sentiment and layered them together.  When I went to assemble the elements, I decided to trim the card down, so now it is 4 1/4" x 7 1/4".  I added a panel of white textured cardstock to the trimmed card base then adhered the contrasting strips in place.  I added some 1mm thick foam squares along the top & bottom of the back of the image panel and a smear of liquid adhesive along the middle then attached it of the contrasting strips.  Lucky last came the sentiment strip.  I added a 2mm thick strip of foam tape along the lower edge of the matted sentiment strip and a thin line of liquid adhesive along the bottom edge of the image panel and adhered it in place.


I love the variety of sentiments that come with this Speeding By
digital stamp set and look forward to making some more cards soon.


~~~*~~~*~~~

This is my 3rd card for Penny's Challenge 453.  You can see my other cards, using the Snowing Cupcakes digital stamp from Imagine That DigistampHERE and HERE or by clicking on the images below.


~~~*~~~*~~~

NOW it's YOUR turn!

I hope that I have inspired you to get creative
and look forward to seeing your projects fill the gallery for
Penny's Challenge 453
on the
Penny's Paper-Crafty Challenge Blog

~~~*~~~*~~~

*** INGREDIENTS ***
Imagine That Digistamp - digital stamp - Speeding By
X-Press It A4 Blending Card
Copic markers - car - B02-04-06 + Y13-15-18
Copic markers - "1" on car - YR04 + R24
Copic markers - tyres - T3-5-7-9
Copic markers - wheel rims - C1-3-5
Copic markers - seat - T3-5-7-9
Copic markers - flames - Y13 + YR04 + R24
Silhouette Cameo
Silhouette Design Store - Design ID #16980
Fire Flourish - Baseball - by Snapdragon Snippets - NOTE: I edited this file
by adding the fire flourish to a long rectangle to make my sentiment strip.
Silhouette Design Store - Design ID #14052
Racing Flags by Loni Stevens
Helmar 450 Quick Dry adhesive - to adhere the layers
Tombow Mono Multi Liquid Adhesive - to adhere the flame sentiment

~~~*~~~*~~~
Sending a big Thank You to Imagine That Digistamp for supplying the digital stamp I used today and for being a sponsor for Challenge 453 on Penny's Paper-Crafty Challenge Blog.
    
~~~*~~~*~~~
I am going to enter my card in the following challenges:
~~~*~~~*~~~

MORE Juggling Cupcakes with Penny's

It's time for a new challenge with us on the
As always, the challenge is Anything Goes.

~~~*~~~*~~~


The sponsors for this challenge are:


~~~*~~~*~~~

Today I have used the Snowing Cupcakes digital stamp from Imagine That Digistamp,
one of our generous sponsors for this challenge, to make fun Christmas card.
This is the second card I have made using this fun image.
You can read all about my first card HERE or by clicking on the image below.


~~~*~~~*~~~


I opened the image in Silhouette Studio and decided to make a round easel card.  I started by drawing a circle, duplicated it a couple of times, aligned two, welded them together so that I had a round card base and a round panel to go on the top.  Next I sized the cute snowman image panel to fit on the front panel, along with several matting layers.  I duplicated the largest matting layer so that I had a panel to mat the inside of the card.  I sized the sentiment, making it large to wedge the card open.
I printed the image panel on X-Press It blending card, heat set, cut with the Cameo then coloured with Copic markers.  The main difference with this card is that instead of colouring the snowman, I coloured the background.  This as a new-to-me style and I think it makes the snowman pop.
I cut the card base an matting panels with the Cameo.  I printed the sentiment, cut manually then added a matting layer, trimming to 1/16" with my Perfect Layers ruler.  I scored the top of the card base along the join and at 2 1/12" to make the top and easel folds.  I adhered the image panel and matting layers to the front panel then added the orange mini pom pom trim.  I adhered the front panel to the bottom half of the front of the card base (for the easel fold).  I trimmed off the top 1/8" of the matting panel for the inside of the card then adhered it in place.  The sentiment panel was popped in place with foam squares, giving a ledge for the front panel to tuck behind when the card is open.

The mini white pom poms add a touch of fun dimension.


The image is so bright and cheery and had great dimension when open.


Although this is a fancy fold card, it goes flat for mailing
and it can also be displayed as a traditional top folding card too.


~~~*~~~*~~~


NOW it's YOUR turn!

I hope that I have inspired you to get creative
and look forward to seeing your projects fill the gallery for
Penny's Challenge 453
on the
Penny's Paper-Crafty Challenge Blog

~~~*~~~*~~~

*** INGREDIENTS ***
Imagine That Digistamp - digital stamp - Snowing Cupcakes
X-Press It A4 Blending Card
Copic markers - snowman & snow - B0000 + N0
Copic markers - nose - YR04-07
Copic markers - scarf - B16 + YR07
Copic markers - buttons & boots - T3-5-7-9
Copic markers - cucpake bases - E23-25
Copic markers - cupcake tops - R22-24-27-29 + YR04-07-09
+ Y13-15-18 + YG03-17-67 + B12-14-16 + BV02-04-08
Copic markers - cherries - R22-24-27 + E25
Copic markers - holly - YG03-17 + R22-24-27
Silhouette Cameo - to cut the circle and card base (my own design)
mini pom pom trim
Helmar 450 Quick Dry adhesive - to adhere the layers & trim

~~~*~~~*~~~
Sending a big Thank You to Imagine That Digistamp for supplying the digital stamp I used today and for being a sponsor for Challenge 453 on Penny's Paper-Crafty Challenge Blog.
    
~~~*~~~*~~~
I am going to enter my card in the following challenges:
~~~*~~~*~~~

ABC Christmas Challenge - U and V are for? - U is for Upcycle & V is for Velocity
the cupcakes are flying through the air at top speed
Aud Sentiments Challenge Blog - Challenge #238 – For A Child
Colour Crazy Challenge - Week 40 – Anything Goes
Colouring In Scrapland - October Challenge – Vellum or Anything Goes
Crafting With An Attitude - Challenge #56 – Anything Goes
Crafty Catz - Challenge #479 – Anything Goes - optional twist: Colours of Autumn
Crafty Sentiments Designs Challenge Blog - Anything Goes 22nd Oct
Dragonfly Dreams Challenge - Use Black (A Lot or a Little)
Get Creative Challenges - Challenge #85 – Anything Goes optional twist Shaped Card (no square/rectangle)
Imagine That Digistamp - Creative Playground Challenge #10 – Anything Goes
Polkadoodles Craft Challenge - Wk42 Anything Goes
QKR Stampede - Challenge #368 – Anything Goes
Simon Says Stamp – Work It Wednesday - Work It Wednesday – August / September 2019 – Celebrate
Sparkles Christmas Challenges - Challenge #105 - Make Us Laugh
The 12 Months Of Christmas Link Up - Challenge #58 – Anything Goes – optional twist: Sensational Santa
I think my snowman is juggling cupcakes, hoping to tempt a visit from Sensational Santa
The Cutie Pie Challenge Blog - Challenge #140 – Anything Goes
Through The Craft Room Door - TTCRD Anything Goes 22nd Oct
Winter Wonderland Challenge Blog - October Challenge – Merry & Bright
Worldwide Open Design Team Challenge - Challenge #10 – 15th Oct – Anything Goes

Juggling Cupcakes with Penny's

It's time for a new challenge with us on the
As always, the challenge is Anything Goes.

~~~*~~~*~~~


The sponsors for this challenge are:


~~~*~~~*~~~

Today I have used the Snowing Cupcakes digital stamp from Imagine That Digistamp, one of our generous sponsors for this challenge, to make fun Christmas card.


I opened the image in Silhouette Studio and decided to make a round easel card.  I started by drawing a circle, duplicated it a couple of times, aligned two, welded them together so that I had a round card base and a round panel to go on the top.  Next I sized the cute snowman image panel to fit on the front panel, along with several matting layers.  I duplicated the largest matting layer so that I had a panel to mat the inside of the card.  I sized the sentiment, making it large to wedge the card open.
I printed the image panel on X-Press It blending card, heat set, cut with the Cameo then coloured with Copic markers.  I cut the card base an matting panels with the Cameo.  I printed the sentiment, cut manually then added a matting layer, trimming to 1/16" with my Perfect Layers ruler.
I scored the top of the card base along the join and at 2 1/12" to make the top and easel folds.  I adhered the image panel and matting layers to the front panel then added the orange mini pom pom trim.  I adhered the front panel to the bottom half of the front of the card base (for the easel fold).  I trimmed off the top 1/8" of the matting panel for the inside of the card then adhered it in place.  The sentiment panel was popped in place with foam squares, giving a ledge for the front panel to tuck behind when the card is open.

The mini orange pom poms add a touch of fun dimension.


The card is so bright and cheery and had great dimension when open.


Although this is a fancy fold card, it goes flat for mailing
and it can also be displayed as a traditional top folding card too.


~~~*~~~*~~~
I had so much fun with this image that I made two cards, the second card is coloured differently and is much more traditional with soft blue and fluffy white trim.  You can read all about it HERE or click on the image below.


~~~*~~~*~~~


NOW it's YOUR turn!

I hope that I have inspired you to get creative
and look forward to seeing your projects fill the gallery for
Penny's Challenge 453
on the
Penny's Paper-Crafty Challenge Blog

~~~*~~~*~~~

*** INGREDIENTS ***
Imagine That Digistamp - digital stamp - Snowing Cupcakes
X-Press It A4 Blending Card
Copic markers - snowman & snow - B0000 + N0
Copic markers - nose - YR04-07
Copic markers - scarf - B16 + YR07
Copic markers - buttons & boots - T3-5-7-9
Copic markers - cucpake bases - E23-25
Copic markers - cupcake tops - R22-24-27-29 + YR04-07-09
+ Y13-15-18 + YG03-17-67 + B12-14-16 + BV02-04-08
Copic markers - cherries - R22-24-27 + E25
Copic markers - holly - YG03-17 + R22-24-27
Silhouette Cameo - to cut the circle and card base (my own design)
mini pom pom trim
Helmar 450 Quick Dry adhesive - to adhere the layers & trim

~~~*~~~*~~~
Sending a big Thank You to Imagine That Digistamp for supplying the digital stamp I used today and for being a sponsor for Challenge 453 on Penny's Paper-Crafty Challenge Blog.
    
~~~*~~~*~~~
I am going to enter my card in the following challenges:
ABC Christmas Challenge - U and V are for? - U is for Upcycle & V is for Velocity
the cupcakes are flying through the air at top speed
Aud Sentiments Challenge Blog - Challenge #238 – For A Child
Colour Crazy Challenge - Week 40 – Anything Goes
Crafty Catz - Challenge #479 – Anything Goes - optional twist: Colours of Autumn
Crafty Sentiments Designs Challenge Blog - Anything Goes 22nd Oct
Creatalicious Challenges - Challenge #173 – Anything Goes optional Autumn/Halloween
Get Creative Challenges - Challenge #85 – Anything Goes optional twist Shaped Card (no square/rectangle)
Imagine That Digistamp - Creative Playground Challenge #10 – Anything Goes
Polkadoodles Craft Challenge - Wk42 Anything Goes
QKR Stampede - Challenge #368 – Anything Goes
Sparkles Christmas Challenges - Challenge #105 - Make Us Laugh
The 12 Months Of Christmas Link Up - Challenge #58 – Anything Goes – optional twist: Sensational Santa
I think my snowman is juggling cupcakes, hoping to tempt a visit from Sensational Santa
The Cutie Pie Challenge Blog - Challenge #140 – Anything Goes
Through The Craft Room Door - TTCRD Anything Goes 22nd Oct
Winter Wonderland Challenge Blog - October Challenge – Merry & Bright

Thursday 17 October 2019

MORE Christmas Cheer from Penny's

It's time for a new challenge with us on the
As always, the challenge is Anything Goes.

~~~*~~~*~~~

The sponsor for this challenge is:


The Paper Shelter

~~~*~~~*~~~

This is my second card using the For Santa digital stamp from The Paper Shelter, our generous sponsor for this challenge.  Sometimes we're not able to, or don't have enough time to colour images, so today I thought I would make an extra card with the pre-coloured image to show that you can use them for special handmade cards.
My card combines the pre-coloured image with
distressing, delicate sparkle and luscious pearls.


I opened the pre-coloured image in Silhouette Studio, sized to 5 1/4" and printed on smooth white cardstock.  I trimmed the panel to size and distressed the edges with scissors then added a delicate sparkle by roughly brushing the edges with a Clear Wink Of Stella glitter brush.  I matted the panel with a 5 1/4" panel of rose cardstock, distressed the edges a little more then matted the panel again with a 5 3/16" panel of rose cardstock to give it a little more dimension and contrast.  I matted a 6 1/4" top folding card base with crimson cardstock then adhered the matted image panel in place.  I finished off the card by adding pearls to the Christmas Tree.


If you click on the images you can see the delicate sparkle on the distressed edges
and the luscious shine of the pearls ...


~~~*~~~*~~~

 My first card using the For Santa digital stamp from The Paper Shelter was coloured with Copic markers, click HERE or on the image below if you would like to learn more.


~~~*~~~*~~~

NOW it's YOUR turn!

I hope that I have inspired you to get creative
and look forward to seeing your projects fill the gallery for
Penny's Challenge 452
on the
Penny's Paper-Crafty Challenge Blog

~~~*~~~*~~~
*** INGREDIENTS ***
The Paper Shelter - pre-coloured digital stamp - For Santa
Recollections - smooth cardstock - white 50 pack 8 1/2" x 11"
Kaisercraft - weave cardstock - Crimson + Rose
Clear Wink Of Stella glitter brush
Kaisercraft - pearls - Teal
Francheville - pearls - pink
pink pearls coloured with R46 Copic marker
Helmar 450 Quick Dry adhesive - to adhere the layers

~~~*~~~*~~~
Sending a big Thank You to The Paper Shelter for being our sponsor
for Challenge 452 on Penny's Paper-Crafty Challenge Blog.
    
~~~*~~~*~~~
I am going to enter my card in the following challenges: