Showing posts with label cut file. Show all posts

Friday, 1 December 2023

Z is for Z-fold


Z is for Z-fold card
... Christmas canine style


... when you look at the folded card,
it's actually a double Z-fold


This cute fancy Z-fold card started in Silhouette Studio, where I opened the Christmas Dog cut file (details below).  The default size makes a 5 1/2" square card and the largest piece fits neatly on a 12"x12" sheet of cardstock.  I cut all the pieces and all I had to do was burnish the folds and glue all the layers in place.  I assure you, doing that was much easier than choosing what colours and patterned paper to use.  I punched a bundle of pink and white snowflakes, layered them together then dotted then added a flurry to decorate the card.


~~~*~~~*~~~
INGREDIENTS

Pop Up Box Card Christmas Dog – cut file - by Lori Whitlock
- Silhouette Design Store - Design ID #167044
textured cardstock
patterned paper - Sugarplum paper pad
by Paige Taylor Evans - American Crafts
bone folder - to form the folds
Helmar 450 Quick Dry - to adhere the layers
Tombow Mono Multi - to adhere the smaller pieces
Fiskars snowflake punches

~~~*~~~*~~~
I have entered my cards in the

Thursday, 30 November 2023

Pretty Poinsettia - hope it's Merry


Day 30 - Do What You Love

I love making and giving Christmas. I love trying to make multiple cards with
little differences, so that they are still one-of-a-kind ... maybe two-of-a-kind.
Earlier today I made THIS pretty pair of Poinsettia cards using a delicate cut
file and the "Merry & bright" digital sentiment from Beccy’s Place.

My latest cards use the same poinsettia cut file (details & link below)
but a different sentiment.  


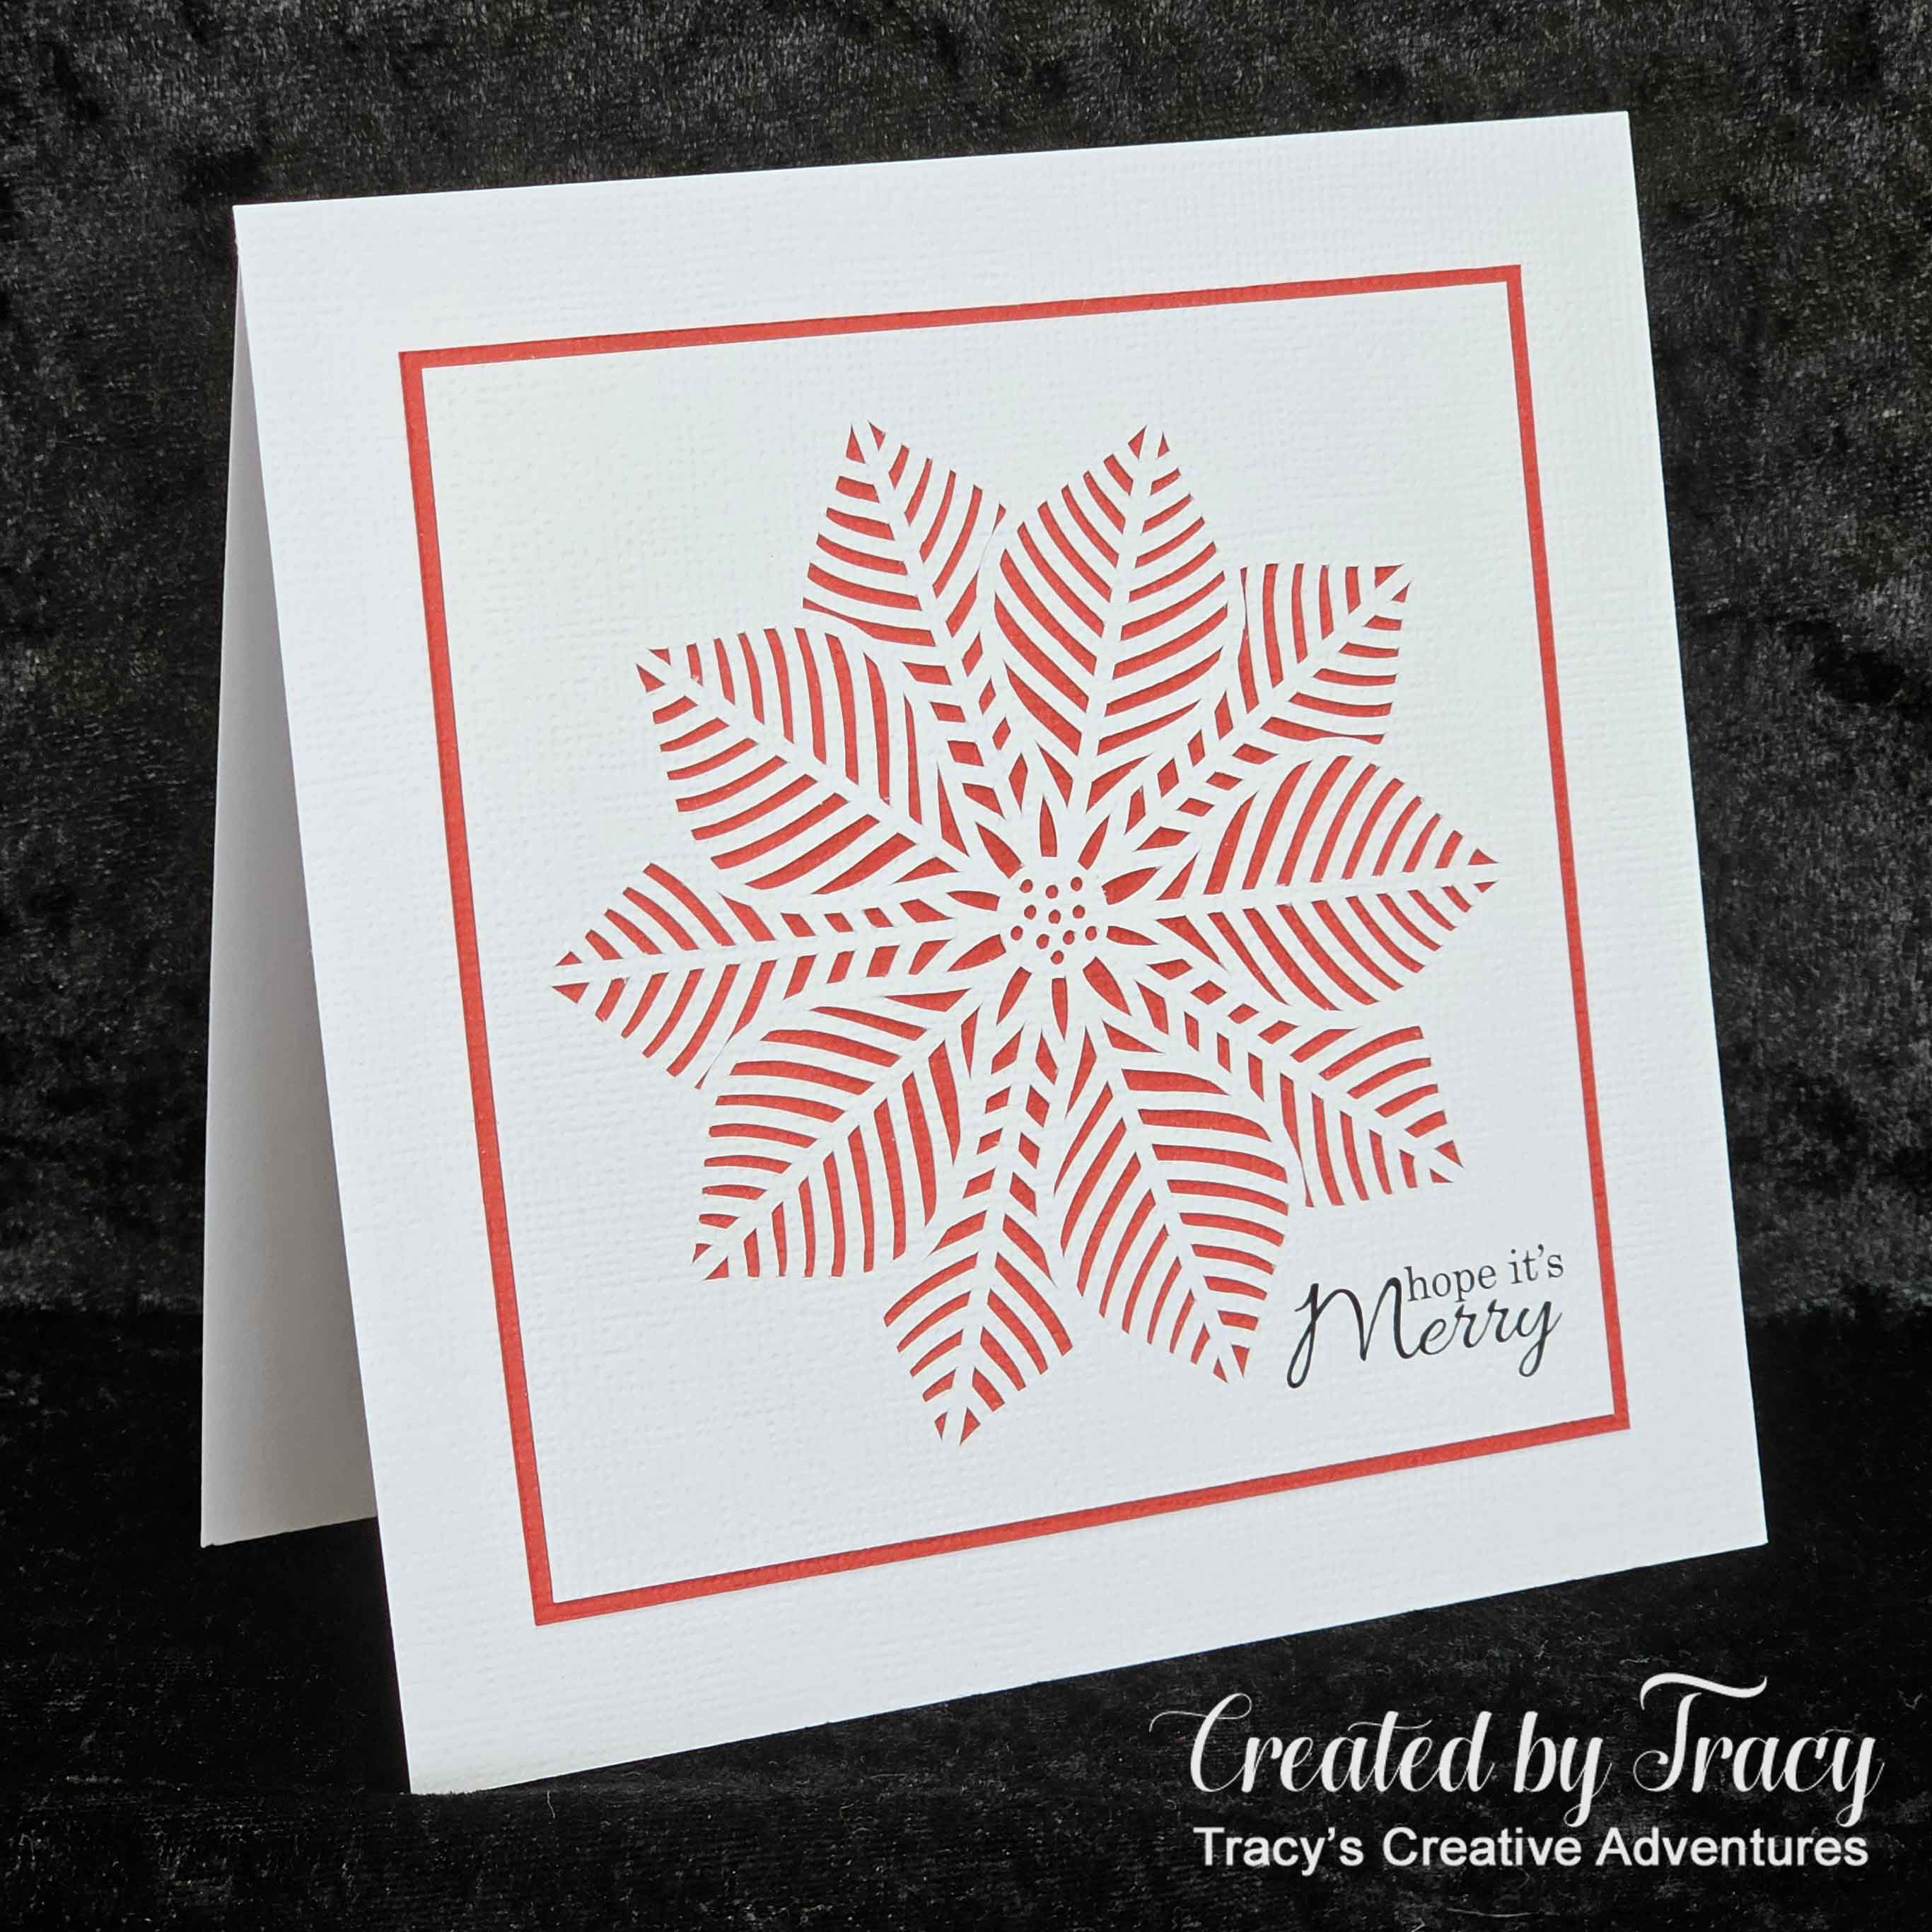
The "hope it's Merry" digital sentiment from the Sing Joy digital stamp set by Beccy’s Place fits perfectly against the curve of the petals.  As with the earlier cards, I sized the poinsettia to fit on a 4 3/8" square panel, added the "hope it's Merry" digital sentiment and printed two panels on white textured cardstock then cut the poinsettia design from the panels using my Silhouette Cameo.  The panels were adhered to vibrant red textured cardstock then trimmed to a 1/8border with a Perfect Layers Ruler.  I made the 1/2card bases from 300gsm smooth white cardstock and matted the front with white textured cardstock.  I adhered the matted poinsettia panels to the matted card bases and soon had another pair of same-but-different modern merry poinsettia Christmas cards.


It's almost optical illusion with this design.  It looks like there are different shades of
red in the poinsettia but I assure it, it's a single layer of crimson red cardstock.


~~~*~~~*~~~
INGREDIENTS

"hope it's Merry" digital sentiment from the
Sing Joy digital stamp set by Beccy’s Place
Unfortunately this digital stamp set is no longer available but you can
view projects created with it on the Beccy's Place blog HERE
textured cardstock - to print & mat the image panel
Poinsettia cut file by Nic Squirrell
Silhouette Design Store - Design ID #307557
scoreboard & bone folder - to form the card bases
Perfect Layers Ruler - to trim matting layer
Helmar 450 Quick Dry - liquid adhesive to adhere layers
Tombow Mono Multi Adhesive - to adhere around delicate poinsettia veins

~~~*~~~*~~~
I have entered my cards in the


Day 30 - Do What You Love


It's no secret, I love to make cards, all sorts of cards,
so of course it's always a pleasure to make more.


Poinsettias hold special memories for me, especially at Christmastime, as they remind me of my Grandmother.  She had potted poinsettias dotted around the house every Christmas and it doesn't feel like Christmas if we don't have at least one in our home.

Most of my poinsettia projects in the past have included dimensional flowers, just like the lovely layers of the "real" ones.  This time I'm using a modern twist with a silhouette of the veined poinsettia petals cut from a card panel and the traditional red showing through from a matted layer underneath.

I opened the poinsettia cut file (details & link below) in Silhouette Studio, along with the "Merry & bright" digital sentiment from Golden Bell digital stamp set by Beccy’s Place.  I decided to use the poinsettia element from the cut file to make a panel to go on a 5 1/2" square card front.  I sized the poinsettia to fit on a 4 3/8" square panel, added the "Merry & bright" digital sentiment and printed two panels on white textured cardstock then cut the poinsettia design from the panels using my Silhouette Cameo.  The panels were adhered to vibrant red textured cardstock then trimmed to a 1/16border with a Perfect Layers Ruler.  I made the 1/2card bases from 300gsm smooth white cardstock and matted the front with white textured cardstock.  I adhered the matted poinsettia panels to the matted card bases and soon had a pair of modern merry poinsettia Christmas cards.


~~~*~~~*~~~
INGREDIENTS

"Merry & bright" digital sentiment from the
Golden Bell digital stamp set by Beccy’s Place
unfortunately this digital stamp set is no longer available but you can
view projects created with it on the Beccy's Place blog HERE
textured cardstock - to print & mat the image panel
Poinsettia cut file by Nic Squirrell
Silhouette Design Store - Design ID #307557
scoreboard & bone folder - to form the card bases
Perfect Layers Ruler - to trim matting layer
Helmar 450 Quick Dry - liquid adhesive to adhere layers
Tombow Mono Multi Adhesive - to adhere around delicate poinsettia veins

~~~*~~~*~~~
I have entered my card in the


Friday, 24 November 2023

U is for Upside Down


Day 24 - U

U is for Upside Down
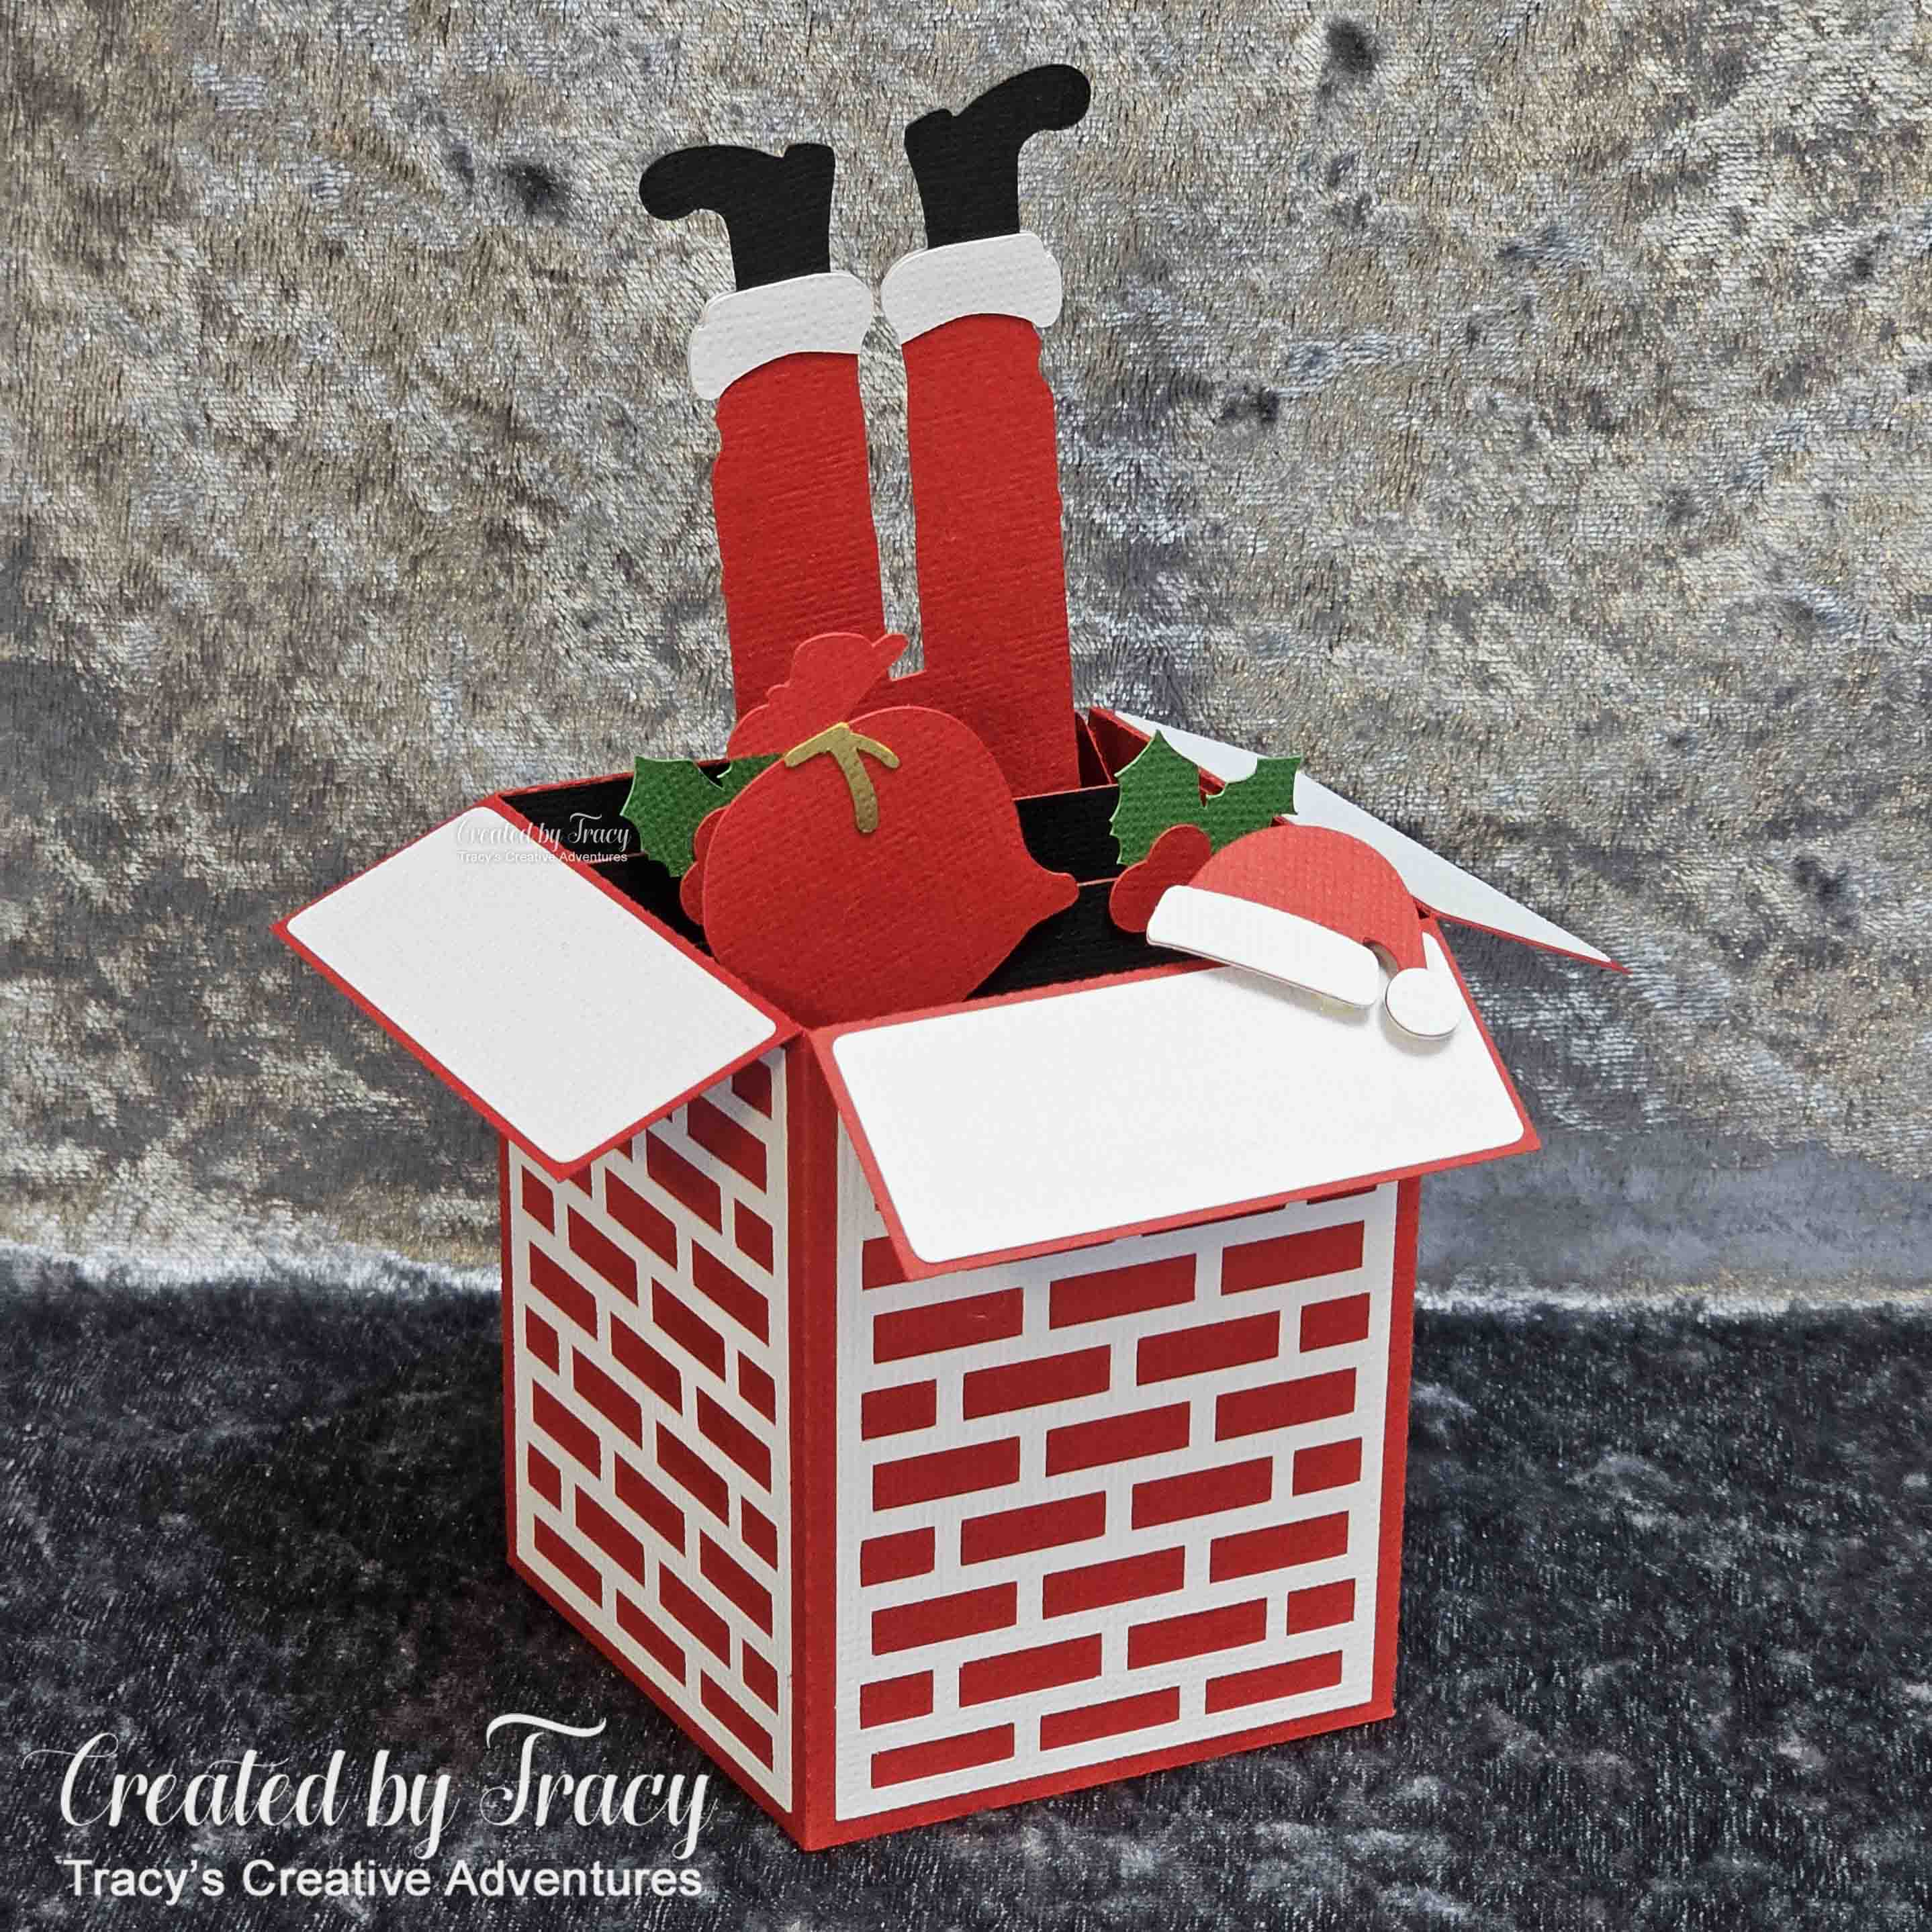
... Santa is stuck Upside Down in the chimney


It’s no secret, I always struggle when we get to the tail end of the alphabet.  Today we have hit the Day “24 - U” prompt and it has consistently been a challenge.  Over the years I have created various versions of an Upside Down Santa in a chimney and this year is no different, sorry for my lack of imagination.  I searched and searched for an Upside Down Santa that I haven’t already used and, success, I found one that ticked all the boxes for me.  It’s a fun fancy fold card with Santa well and truly stuck in the chimney.  So here goes … my cards started, you guessed it, in Silhouette Studio.  I opened the "Santa's Stuck Till Christmas Card In A Box" cut file and set up all the pieces to create two cards.  I cut the pieces, burnished the folds, adhered the white brick panels and snowy flaps.  Next came the layers for Santa, his hat, his sack filled with presents and the holly to go on the layers, all the bits secured together with liquid adhesive.  The bridges are the most important feature for this fancy fold and were the next to go in place.  I secured them with my super strong “book binding” liquid adhesive, ensuring that I folded the card base each way so that the card would fold flat and open smoothly.  I adhered the side panel to form the box card bases, once again opening and closing the card to ensure it would fold flat and open smoothly.  I went to adhere the decorative elements to the bridges and … YIKES … they disappeared against the red background.  I was so used to making box cards with all the base pieces the same colour that I hadn’t noticed that the sample photo had a dark background inside.  I grabbed some black cardstock from my stash and trimmed some panels to mat the bridges and soon all was good with the world again.  I popped and glued the decorative elements in place and Santa was finally stuck Upside Down in the chimney


The cards fold flat for mailing.


This is a fun fancy fold and is sure to bring a smile as it comes out of the envelope.


Santa's boot, sack and cap have backing pieces, so the card looks
"complete" with trims and ribbons  from both the front and back.


~~~*~~~*~~~
INGREDIENTS
Santa's Stuck Till Christmas Card In A Box - cut file by Suzanne Cannon
- Silhouette Design Store - Design ID #208370
textured cardstock
bone folder - to form the folds
Helmar Acid Free Professional - a liquid "book binding" strength glue
Helmar 450 Quick Dry - to adhere the larger layers
Tombow Mono Multi - liquid adhesive for small pieces
gold marker - to add some pop to the string on Santa's sack

~~~*~~~*~~~
I have entered my cards in the

Friday, 17 November 2023

O is for Ornaments


O is for Ornaments,
Ornament Tags


These tags started in Silhouette Studio.  I opened the Ornament Gift Tag cut file (by Dreaming Tree), along with the “Happy Christmas” digital sentiment from the Stanley Clause digital stamp set by Beccy’s Place.  I sorted out all the different pieces and set them up to create four tags.  I added the digital Happy Christmas sentiment to the tag liners and sent them to print and cut.  All the layers were adhered in place with liquid adhesive, then finished off with some sparkling purple rhinestones and ribbon.


~~~*~~~*~~~
INGREDIENTS
Ornament Gift Tag - FREE cut file - by Dreaming Tree
“Happy Christmas” digital sentiment
- from the Stanley Clause digital stamp set by Beccy’s Place
textured cardstock
Helmar 450 Quick Dry - liquid adhesive - for larger layers
Tombow Mono Multi - liquid adhesive - for the delicate layers
purple rhinstones
purple ribbon

~~~*~~~*~~~
I have entered my cards in the

Tuesday, 14 November 2023

K is for Kraft


K is for Kraft
... but it really should be "D is for Dotty" because I'm
going dotty from dotting glue on the back of the trees
... so many dots ...


My Kraft tags started in ... you guessed it, Silhouette Studio.  I opened the Christmas Tree Tag - cut file from My Scrap Chick and adjusted tag height down a smidgen, leaving the width the same and the delicate Christmas Tree as original size.  The tags are 9/16" wide by 5 13/16" high and I was able to fit eight on my cutting mat.  I made some reinforcing rings to go over the hole in each tag, not that I expect them to do any hard work, I just like how they finish them off on both sides.  I used the hole size in the tag, then added an offset, so that the ring would protect the hole and still leave a little gap at the top.  I cut the tags and reinforcing rings from Kraft cardstock.  I crossed my fingers and toes and sent the Christmas Trees to cut from white cardstock AND they cut perfectly.  I'm thrilled, the branches are so narrow, less than 1/32" of an inch or, if you're like me and work in metric, that's less than 1mm.  Pretty awesome, right?


I dotted (... and dotted and dotted) the backs of the trees and adhered them to the tag bases.  A reinforcing ring was glued to the front and back of each tag and soon all eight were finished.  I'm still in awe of the delicate trees.  I have to confess that I'm a bit of a ribbon "collector" and have plenty in my stash, so will add the ribbon to the tags when I go to use them, so they can coordinate with the wrapping paper.


NOTE: I'm trying to use a design from Beccy's Place for the prompt each day.
This project doesn't include any but I will keep doing my best to do it
... maybe I should drag out my favourite Jingle Bell set for another workout.

~~~*~~~*~~~
INGREDIENTS
note: I made reinforcing rings to go on both sides of the tag holes
Kraft cardstock - for the tag bases
white textured cardstock - for the delicate trees
Tombow Mono Multi - liquid adhesive

~~~*~~~*~~~
I have entered my tags in the

Saturday, 11 November 2023

H is for Holly Envelopes


H is for Holly Envelopes
... to match the Holly Cards I made earlier


I opened the Holly Note Card cut file in Silhouette Studio and enlarged the card and envelope so that my card base was 6.75 inches wide and 5.25 inches high, with these perfect fit matching envelopes.  The file comes with a matching envelope, so the size of my card was limited by how large I could make the envelopes.  To adjust the size, I grouped them together and sized the envelopes as large as I could, with the envelope just fitting on a 12x12 sheet of cardstock and within the cutting limits of my mat.  I cut the envelope panels and liner pieces from textured cardstock and scored the fold lines.  Yes, I deleted the scorelines from the cut file, as I prefer the smooth edges the scoreboard and bone folder create.  I adhered the green liner panel to the envelope flaps.  To assemble the envelopes, I placed the Holly cards on the flat envelope pieces in the middle, folding the side flaps inwards, ran a line of liquid adhesive along the bottom edges of the flaps, then folded the bottom flap up and pressed in place over the side flaps.  The cards have lots of layers and adhering the flaps in place this way ensures that they're not too snug a fit for easily inserting-removing them.

When I closed the top flap of the envelopes I decided the holly berry detail needed to contrast against the holly leaves, so I adhered some red rhinestone berries to finish them off.


The Holly cards fit inside perfectly,
almost like they were made-to-measure.


NOTE: I'm trying to use a design from Beccy's Place for the prompt each day.
This project doesn't include any BUT the Holly Cards that match
these envelopes used a Beccy's Place digital sentiment stamp.

HERE are the Holly Cards shared earlier,
or click on the photo to read all about them.

~~~*~~~*~~~
INGREDIENTS
Holly Note Card – free cut file - from Dreaming Tree
textured cardstock
scoreboard & bone folder - to form the envelopes
Helmar Acid Free Professional - liquid adhesive - for the side flaps
Tombow Mono Multi - liquid adhesive - for the liner on the top flap
red rhinestones - to accent the envelope flap

~~~*~~~*~~~
I have entered my envelopes in the