Saturday, 25 April 2015

Paper Smooches Blog Hop

It's Pep Rally Week on the Paper Smooches Blog.
Kim and the DT will be sharing fun and fabulous projects using the
two new stamps and ten new dies from the May release.
CREATIVE INSPIRATION
CRAFTY TEMPTATION
AND the chance to WIN one of FOUR $25 Paper Smooches gift certificates too!!!
AWESOME!!!

http://www.papersmoochesstamps.com/

http://www.papersmoochesstamps.com/
Head on over to the Paper Smooches Blog and get hopping now,
GOOD LUCK :)

Tuesday, 21 April 2015

Get Well Soon

I made this card for a friend and I am hoping
the BIG & BEAUTIFUL
delivers the message loud & clear and brings
good cheer to help her along the road to recovery.
The sentiment is star of the show,
such a fabulous handwritten font and
an awesome 5 3/4" across - WOW!!!
... I don't like it when family and friends are ill but
I will enjoy using this sentiment die when they are.


The background was created using the Couture Creations "Peacock Pleasure" embossing folder in my Big Shot.  After some trial & error I found that I needed to cut the cardstock to the exact size I wanted because it was difficult to trim without it tearing.  I also had to include a sheet of vellum under the top layer to prevent the cardstock cracking too.  (Secure the vellum with a narrow strip of double-sided tape at each end, if you use Washi Tape it will emboss into your cardstock.)
The textured cardstock is Kaisercraft Peacock, American Crafts White & Powder.
I adhered my paper layers in place with Helmar 450 Quick Dry Adhesive.
The sentiment is actually 4 layers (3 peacock, topped with white), each one secured in place with Tombow Mono Multi Liquid Adhesive, applied with a fine tipped brush.
I lined the inside of the card with layers the same as the front and included the die cut sentiment again, this time in peacock.
Here is a close-up showing the deep & crisp embossing, the added contrast of the smooth rings on the textured cardstock and the dimension of the lovely long layered sentiment die.

* * * * *
I have entered my card in the
http://papersmoochessparks.blogspot.com.au/2015/04/april-19-25-anything-goes-wk3-challenge.html 
http://www.papersmoochesstamps.com/

This challenge closes 11:59pm PST Saturday 25th April 2015

* * * * *
I gave the a card a little "photo shoot" with a tiny crystal vase filled with geraniums.


Friday, 17 April 2015

PaperCrafter's Corner - Magazine Mondays Week #95

Update 21st April 2015

Yes, I've had another week of creative distraction from
the PaperCrafter's Corner Magazine Mondays Week #95 challenge.

PaperCrafter's Corner - Magazine Mondays Week #95

http://papercrafterscorner.com/  http://papercrafterscorner.com/blog/papercrafting-challenge-magazine-mondays-week-95/
This challenge closes midnight Central Sunday 19th April 2015

I had GREAT intentions with three projects in mind
but I confess that I am experiencing technical difficulties


=> MORE to come soon!!!

* * * * *  Update 21st April 2015  * * * * *

After lots of searching online
and lots of trial and error,
I am excited to say that I have had success!!!

 I adhered vellum to the top of the embossing folder with a narrow strip of double sided tape at the top & bottom ends (don't use Washi Tape - it leaves lines embossed on your card stock) and lightly spritzed both sides of the card stock with water then put the sandwich through my Sizzix Big Shot.


Check out the beautiful deep embossed design with lovely crisp edges.
The vellum came out a little worse for wear, so I will be looking for a heavier weight to see if that holds up better.  Some videos mentioned vellum card stock, so that sounds promising.

I didn't get to make the card I planned for the PCC challenge but I did use this panel to make a card and you can see it here.

8th birthday "celebr 8" shaker card

Shaker cards are so much fun - interactive and sparkly too!!!

Eight balloons for a GR8 birthday :)


Check out that CUTE smiley face :)

The card is a tall A5 size (8 1/4" high).  I confess that I trimmed off the "stepper" part from the front of a blank A5 Stepper Card Base by Fundamentals (Ruby Rock-It).  I LOVE this size, it is a top fold and the cardstock is so sturdy.

I used Paper Smooches Pinked Circles, Balloons, Big Balloons & Birthday Words dies and 4mm & 6mm Sparkling Clear, Raspberry & Cobalt sequins from Pretty Pink Posh.  This is the second shaker card I have made and I still have more to learn to make them better, full details in the tutorial below.
* * * * *
I have entered my card in the
http://sparkleandshinechallenge.blogspot.com.au/   http://sparkleandshinechallenge.blogspot.com.au/2015/04/sparkle-shine-challenge-four-sketch.html

Entries close 11:55pm EST Saturday 25th April 2015

* * * * *
I have also entered my card in the
http://www.craftindesertdivas.com/2015/04/craft-it-up-link-it-up-shaker-linky.html


Entries close 12pm Arizona MST Sunday 26th April 2015
* * * * *
I have also entered my card in the
Here is the inspiration pic & challenge badge
http://fusioncardchallenge.blogspot.com.au/2015/04/fusion-elegance.html http://fusioncardchallenge.blogspot.com.au/
My card is a FUSION of the inspiration photo and the sketch.
The sparkling clear sequins remind me of the crystal ware too.

Linky closes noon PST Tuesday 21st April 2015

* * * * *
I have also entered my card in

http://www.simplycreatetoo.blogspot.com.au/

This challenge starts 10th April and ends 24th April 2015

* * * * *
Here is my tutorial for creating this card.
  1. Cut the cobalt blue cardstock mat, patterned paper & accent strips to size and set in place - do not adhere yet
  2. Align the largest die from the Paper Smooches Pinked Circles die set over the accent strips & patterned paper to where the shaker window will be, secure in place over the top accent strip & patterned paper with Washi Tape, die cut (I used my Big Shot) then carefully remove the tape so that the paper or cardstock doesn't tear.  Layer the accent strips together and carefully trip the lower strip so that it doesn't show from under the die cut section of the top strip.  I kept the lower strip separate so that the other two layers would cut cleanly with the die, didn't want to overload the die or my Big Shot sandwich.
  3. Adhere the accent strips to the patterned paper.
  4. Adhere a section of acetate to the window.  I used Tombow Mono Multi Liquid Adhesive.
  5. Cut a sheet of foam slightly smaller than the patterned paper panel, mark the window and cut out an area slightly larger than the pinked window.  I cut mine too large and later regretted it, because all the sequins are not visible.
  6. Cut white cardstock to the same size as the patterned paper.
  7. Adhere the white cardstock to the blue mat.
  8. Adhere the foam sheet to the white layer, ensuring the window is in the right position.  I used Helmar 450 Quick Dry because I find it is easier to align layers with a liquid adhesive and this is a strong, clear glue that dries fast and secures different surfaces together well, just like a hot glue gun without the burns.  Make sure that the layers are pressed down evenly so that there are no bulges of glue underneath.
  9. Fill the well with sequins - I used a mix of 4mm & 8mm Sparkling Clear, Raspberry & Cobalt sequins from Pretty Pink Posh.
  10. Adhere the patterned paper on top of the foam sheet, ensuring the edges & window are aligned.
  11. Cut assorted balloons using Paper Smooches Balloons die set.  I also used the smiley face from the Paper Smooches Big Balloons die set on one of the balloons then layered it so that the smiley face was clearly visible.  Tie thread to each balloon and knot three times, I found that a double knot started to come loose during handling.
  12. Secure the balloons in place, some flat against the card, others on foam squares for dimension.
  13. Draw the balloon strings together, knot & secure with a brad.  This is why I didn't adhere the mat to the card base earlier, so the brad is pushed through the layers and well hidden from behind without any bulges.
  14. Cut several sets of the "celebrate" word from the Paper Smooches Birthday Words die set.  Because I wanted to do a play on words for this 8th birthday card, I only used the "celebr" portion, laying several together for dimension, adhering with Tombow Mono Multi.  I used the negative to align the letters while adhering them together and to the patterned paper.
  15. Adhere the finished panel to the card base.
Monday, 13 April 2015

PaperCrafter's Corner - Magazine Mondays - Week #94

I should have been making birthday cards
... but I got distracted by the challenge over at the PaperCrafter's Corner.
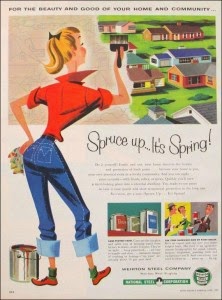
Here is the inspiration image for Magazine Mondays Week #94
http://papercrafterscorner.com/blog/papercrafting-challenge-magazine-mondays-week-94/

and here is the décor piece I made, just for fun.

"It's not easy being queen of the universe."


The Itty Bitty "Queen of the Universe" stamp by the Unity Stamp Company is a recent addition to my crafty stash and this challenge was the perfect opportunity to give it an inking.  I used Jet Black Stazon ink on watercolour paper.
I coloured her in using Faber-Castell ArtGRIP Aquarelle watercolour pencils.  I didn't have any beige or flesh tone, so layered a pale yellow with metallic gold and was quite happy with the result.

This was my 1st time using Wink Of Stella - I only have white so far, so I thought she needed a sparkling white glove and belt.  I confess that I must have squeezed it a little too hard and it came out so fast that I had to quickly blot it up using a brush.  Note to self - DON'T use your watercolour brush over Wink Of Stella without washing it well BEFORE using it again!!!  A little sparkle goes a long way and her red shirt has an unplanned sparkle to it.

After colouring was complete, I fussy cut her out using my Fiskars Soft Grip Microtip scissors and Fiskars Fingertip Craft Knife then went around all the edges with a black Faber-Castell PITT artist pen.  A queen needs her jewels so initially I gave her a diamond earing then went a bit overboard with the bling and added rhinestones for buttons on her blouse too ... still thinking about removing them.  I shortened the sentiment by stamping on watercolour paper, shaded with green pencil, fussy cutting out the words I wanted, holding each one in place with my piercing tool while I inked around the edges.  Oh, I added some Wink of Stella sparkle to "queen" too.

The floral background is 6 1/2" x 5" ... it reminded me of old wallpaper and felt "right" for the image.  The papers were from the Kaisercraft Miss Match 6 1/2" x 6 1/2" paper pad.  I love the papers in this pad so much that I have several in my stash.  I inked around the edges of the papers with Vintage Photo Distress Ink ... ANOTHER technique that I NEED to work on, I think I load my dauber with too much ink, so will try a blending tool and maybe even get a craft sheet instead of paper.
  
Here is a close-up - can you see that she even has red lipstick and cheek blusher?


Thank You for visiting.


Sunday, 12 April 2015

ANOTHER Happy 10th Birthday


My card is a tall A5, standing 8 1/4" high.
I used the Paper Smooches Pinked Circles Dies and Birthday Words Dies.
The sentiment is two die cuts adhered together (blue then white on top) using Tombow Mono Multi Liquid Glue.  To give it a little more contrast to the patterned paper, I layered the sentiment over some vellum and secured the panel in place with brads.
NOTE: the sentiment is a very delicate die cut and I used the "negative" to ensure all the layers were aligned perfectly on top of each other.  I also used the negative when I was adhering the letters to the vellum so that all the letters were spaced & aligned perfectly.

Here is a close-up of the sentiment panel.

The pinked circles are layered on foam sheets for extra dimension.
The patterned panel is also layered on a foam sheet and the layered banners secured in place with foam squares, so they have dimension and sit level with the sentiment panel.
We have two birthday boys turning 10 within a week of each other, so this is the 2nd card I created using this design, I just mixed the colours around a bit from the 1st one found here.


 * * * * *
I have entered my card in the Paper Smooches SPARKS
April 5-11 Anything Goes (wk1) challenge


http://papersmoochessparks.blogspot.com.au/2015/04/april-5-11-anything-goes-wk1-challenge.html http://www.papersmoochesstamps.com/

http://papersmooches.blogspot.com.au/ http://papersmooches.blogspot.com.au/
http://papersmoochessparks.blogspot.com.au/

The dies can be purchased from the Paper Smooches Store
Birthday Words Dies
* * * * *
I have also entered my card in the


http://www.craftindesertdivas.com/2015/04/craft-it-up-link-it-up-anything-goes.html  http://www.craftindesertdivas.com/

http://www.craftindesertdivas.com/
 This challenge is open until Sunday 12th April 12pm Arizona MST

* * * * *
I have also entered my card in the
Here is the inspiration pic & challenge badge
http://fusioncardchallenge.blogspot.com.au/2015/04/fusion-elegance.html http://fusioncardchallenge.blogspot.com.au/
My card is a FUSION of BOTH the colours from the inspiration photo and the sketch.
Linky closes Tuesday 21st April noon PST

* * * * *
I have also entered my card in

http://www.simplycreatetoo.blogspot.com.au/

This challenge starts 10th April and ends 24th April 2015

* * * * *

HAPPY 10th Birthday


Exciting update 14th April 2015
My card was a Featured Player


My card is a tall A5, standing 8 1/4" high.
I used the Paper Smooches Pinked Circles Dies and Birthday Words Dies.
The sentiment is three die cuts adhered together (blue, white then red on top) using Tombow Mono Multi Liquid Glue.  To give it a little more contrast to the patterned paper, I layered the sentiment over some vellum and secured the panel in place with brads.
NOTE: the sentiment is a very delicate die cut and I used the "negative" to ensure all the layers were aligned perfectly on top of each other.  I also used the negative when I was adhering the letters to the vellum so that all the letters were spaced & aligned perfectly.
The pinked circles are layered on foam sheets for extra dimension.
The patterned panel is also layered on a foam sheet and the layered banners secured in place with foam squares, so they have dimension and sit level with the sentiment panel.

Here is a close-up of the sentiment panel.

* * * * *
I have entered my card in the Paper Smooches SPARKS
April 5-11 Anything Goes (wk1) challenge

http://papersmooches.blogspot.com.au/ http://papersmooches.blogspot.com.au/

http://papersmoochessparks.blogspot.com.au/

The dies can be purchased from the Paper Smooches Store

* * * * *
I have also entered my card in the


http://www.craftindesertdivas.com/2015/04/craft-it-up-link-it-up-anything-goes.html  http://www.craftindesertdivas.com/

http://www.craftindesertdivas.com/

This challenge is open until Sunday 12th April 12pm Arizona MST

* * * * *
I have also entered my card in the
Here is the inspiration pic & challenge badge
http://fusioncardchallenge.blogspot.com.au/2015/04/fusion-elegance.html http://fusioncardchallenge.blogspot.com.au/
My card is a FUSION of BOTH the colours from the inspiration photo and the sketch.
Linky closes Tuesday 21st April noon PST

* * * * *
I have also entered my card in

http://www.simplycreatetoo.blogspot.com.au/

This challenge starts 10th April and ends 24th April 2015

* * * * *