Wednesday, 9 August 2023

Love you . . . more . . .

Love you . . . more 


My 5" x 7" card uses a digital image and sentiment from Beccy's Place.
I opened the "Simple Flower Bunch" image and "Love you" sentiment from the Simple Sentiments digital stamp set and overlayed them together (inspired by Beccy's card HERE) to complete the design.  I printed the image panel on X-Press It Blending Card, coloured with Copic markers, trimmed to size, matted on textured cardstock, trimmed to size using a Perfect Layers Ruler, adhered on to a 5" x 7" panel, then adhered the panel to a top folding card base.  I made the card base by cutting two 5" x 7" 300gsm smooth cardstock panels, scoring the "top back" at 3/4" then adhering the top panels together.
 
... I used this same "Simple Flower Bunch" image and design style with the "Enjoy the little things" sentiment to make a second card HERE


I used this same "Love you" sentiment and a "Simple Flower" image
from the Simple Sentiments digital stamp set
to make a CAS card filled with love HERE

~~~*~~~*~~~
INGREDIENTS
"Simple Flower Bunch" image and "Love you" sentiment from the Simple Sentiments digital stamp set – unfortunately this sweet set of images and sentiments is no longer available in Beccy’s Store but projects shared on the blog can be found HERE.
X-Press It Blending Card
Copic markers - R12-R14-R17-YG25-YG17-YG67
and of course the trusty "0" colourless marker for dissolving bloopers
300gms smooth white cardstock - for card base
American Crafts - White textured cardstock
American Crafts - Fireberry textured cardstock
Helmar Acid Free Professional Glue -
liquid adhesive - to create top fold of card base
Helmar 450 Quick Dry -
liquid adhesive - to secure all the layers in place
Perfect Layers Ruler

~~~*~~~*~~~
I have entered my card in the August Challenge at Beccy's Place Challenges

Tuesday, 8 August 2023

Aloe love . . .


My card used two digital images and a sentiment from Beccy's Place.  I opened the "Little Aloe" and "Little Pot" images and "With love" sentiment from the "A Little Something" and assembled them together to complete the design.  I printed the image panel on X-Press It Blending Card, coloured with Copic markers, trimmed to size, matted on textured cardstock, trimmed using a Perfect Layers Ruler, adhered on to a brown panel, then adhered the panel to a top folding 5" x 6" card base and no, I don't know what happened, it was meant to be a 5" x 7" card but I must have been a bit over zealous when trimming the image panel down to size.  I made the card base from 300gsm smooth cardstock, adhering two panels at the top, with the back panel scored at 1" to allow the card to open and stand.
  
... needless to day ... I love this sentiment and image combo ...


~~~*~~~*~~~
INGREDIENTS
"Little Aloe" and "Little Pot" images and "With love" sentiment from the "A Little Something" digital stamp set – unfortunately this beautiful set of images and sentiments is no longer available in Beccy’s Store but projects shared on the blog can be found HERE.
X-Press It Blending Card
Copic markers - pot - E11-13-15-17-18 + YG99
Copic markers - soil - E44-47-49
Copic markers - aloe plant - G40-43-46 + G29
and of course the trusty "0" colourless marker for dissolving bloopers
300gms smooth white cardstock - for card base
American Crafts - White textured cardstock
American Crafts - brown textured cardstock
Helmar Acid Free Professional Glue -
liquid adhesive - to create top fold of card base
Helmar 450 Quick Dry -
liquid adhesive - to secure all the layers in place
Perfect Layers Ruler

~~~*~~~*~~~
I have entered my card in the August Challenge at Beccy's Place Challenges


All things grow with love . . .


My pair of slimline (3 1/2" x 8 1/2") cards use two digital images and a sentiment from Beccy's Place.  I opened the "Little Aloe" and "Little Pot" images and "With love" sentiment from the "A Little Something" and assembled them together to complete the design.  I printed the image panels on X-Press It Blending Card, coloured with Copic markers, trimmed to size, matted on textured cardstock, trimmed using a Perfect Layers Ruler, adhered on to 3 1/2" x 8 1/2" panels, then adhered the panels to top folding slimline card bases.  I made the card bases from 300gsm smooth cardstock.


... you may have already guessed, but I have to confess,
I love this sentiment and image combo ...


~~~*~~~*~~~
INGREDIENTS
"Little Aloe" and "Little Pot" images and "With love" sentiment from the "A Little Something" digital stamp set – unfortunately this beautiful set of images and sentiments is no longer available in Beccy’s Store but projects shared on the blog can be found HERE.
X-Press It Blending Card
Copic markers - pot - E11-13-15-17-18 + YG99
Copic markers - soil - E44-47-49
Copic markers - aloe plant - G40-43-46 + G29
and of course the trusty "0" colourless marker for dissolving bloopers
300gms smooth white cardstock - for slimline card bases
American Crafts - White textured cardstock
American Crafts - brown textured cardstock
Helmar Acid Free Professional Glue -
liquid adhesive - to create top fold of card base
Helmar 450 Quick Dry -
liquid adhesive - to secure all the layers in place
Perfect Layers Ruler

~~~*~~~*~~~
I have entered my card in the August Challenge at Beccy's Place Challenges


Monday, 31 July 2023

With more love . . .

  Today I had some fun making some 5" x 7" cards
using a digital stamp from the Beccy's Place Store,
digital sentiments, also from Beccy's Place and
combined them with some fussy cutting and layering.
No, you're not seeing things, this is my fourth card today.  It's the same image as the third one shared earlier, except I have mirrored then rotated the image, used a different sentiment and made a top folding landscape card.


I printed the image panel on white textured cardstock, trimmed to size, matted with Apricot Weave cardstock, trimmed to 1/16" border using a Perfect Layers Ruler, adhered to a 5" x 7" cardstock panel, then adhered the panel to a top folding card base.
I made the card base by cutting two 5" x 7" 300gsm smooth cardstock panels,
scoring the "top back" at 3/4" then adhering the top panels together.
I printed off an extra large flower and if you look closely,
you will be able to see the subtle dimension it adds to the card.

Some days you need to do some "scissor therapy".
Although my hands were hurting, I fussy cut a large flower to go on the front of each of my four cards and it felt good to see them slightly curled in readiness for gluing.  I went around the edges of each flower with my Memento Tuxedo Black Ink dual tip marker, so that no white edges were visible.


And here is a pic of the card I mentioned earlier (3rd for the day).  The image is mirrored, then rotated and the same sentiment used.

And here it is compared to my second card, the images are
mirrored and different sentiments used.

~~~*~~~*~~~
INGREDIENTS
digital stamp set from Beccy's Place store
“For you” sentiment – from the Geums digital stamp set – no longer available in Beccy’s store but projects shared on the blog can be found HERE
“With love” sentiment – from the Magnolias digital stamp set – no longer available in Beccy’s store but projects shared on the blog can be found HERE
White textured cardstock - American Crafts
Apricot Weave cardstock - Kaisercraft
300gms smooth white cardstock - for card base
Helmar Acid Free Professional Glue -
liquid adhesive - to create top fold of card base
Helmar 450 Quick Dry -
liquid adhesive - to secure all the layers in place
Perfect Layers Ruler

~~~*~~~*~~~
I have entered my card in the July Challenge at Beccy's Place Challenges

With love . . .

 Today I had some fun making some 5" x 7" cards
using a digital stamp from the Beccy's Place Store,
digital sentiments, also from Beccy's Place and
combined them with some fussy cutting and layering.
No, you're not seeing things, this is my third card today, the same image as the first one shared earlier, except I have mirrored the image and used a different sentiment.


I printed the image panel on white textured cardstock, trimmed to size, matted with Apricot Weave cardstock, trimmed to 1/16" border using a Perfect Layers Ruler, adhered to a 5" x 7" cardstock panel, then adhered the panel to a top folding card base.
I made the card base by cutting two 5" x 7" 300gsm smooth cardstock panels,
scoring the "top back" at 3/4" then adhering the top panels together.
I printed off an extra large flower and if you look closely,
you will be able to see the subtle dimension it adds to the card.

Some days you need to do some "scissor therapy".
Although my hands were hurting, I fussy cut a large flower to go on the front of each of my four cards and it felt good to see them slightly curled in readiness for gluing.  I went around the edges of each flower with my Memento Tuxedo Black Ink dual tip marker, so that no white edges were visible.


I made another card using the same sentiment
and rotating the image.

And here is a pic of the card I mentioned earlier,
image is mirrored and a different sentiment used. 

~~~*~~~*~~~
INGREDIENTS
digital stamp set from Beccy's Place store
“For you” sentiment – from the Geums digital stamp set – no longer available in Beccy’s store but projects shared on the blog can be found HERE
“With love” sentiment – from the Magnolias digital stamp set – no longer available in Beccy’s store but projects shared on the blog can be found HERE
White textured cardstock - American Crafts
Apricot Weave cardstock - Kaisercraft
300gms smooth white cardstock - for card base
Helmar Acid Free Professional Glue -
liquid adhesive - to create top fold of card base
Helmar 450 Quick Dry -
liquid adhesive - to secure all the layers in place
Perfect Layers Ruler

~~~*~~~*~~~
I have entered my card in the July Challenge at Beccy's Place Challenges

More for you . . .

 Today I had some fun making some 5" x 7" cards
using a digital stamp from the Beccy's Place Store,
digital sentiments, also from Beccy's Place and
combined them with some fussy cutting and layering.
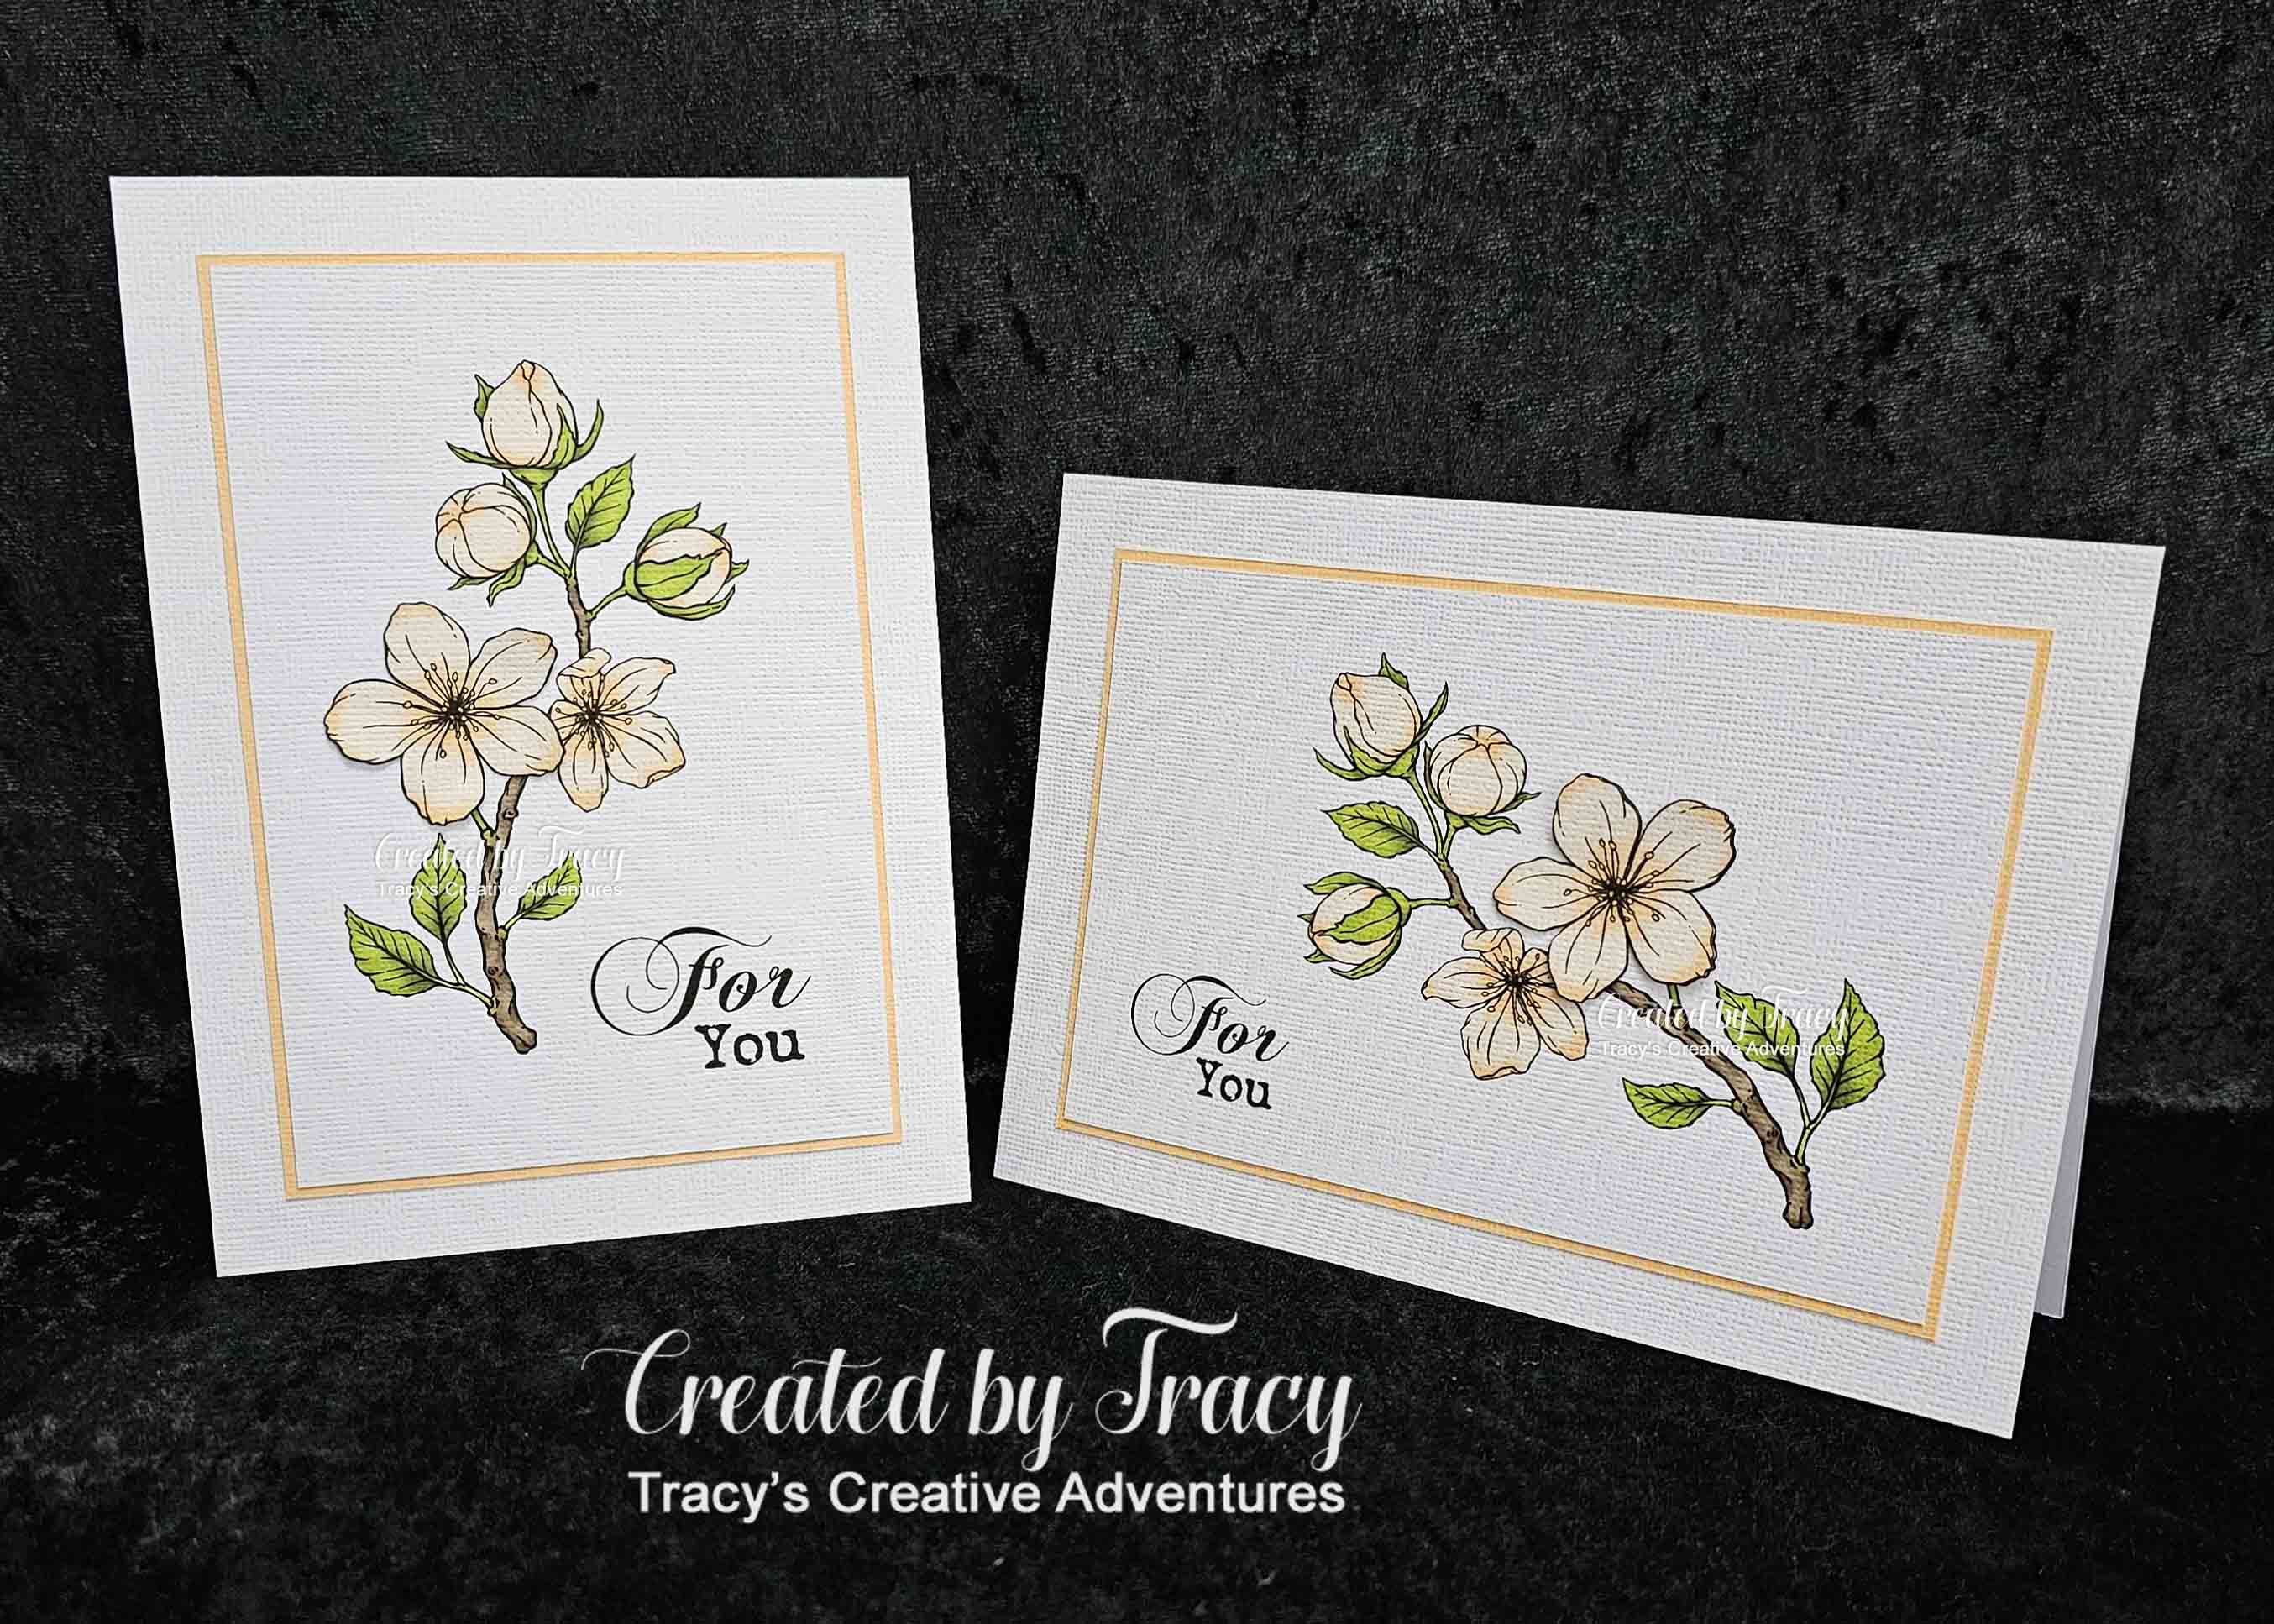
No, you're not seeing things, this is my second card today.  It's the same image as the first one shared earlier, except I have rotated the image, used the same sentiment and made a top folding landscape card.


I printed the image panel on white textured cardstock, trimmed to size, matted with Apricot Weave cardstock, trimmed to 1/16" border using a Perfect Layers Ruler, adhered to a 5" x 7" cardstock panel, then adhered the panel to a top folding card base.
I made the card base by cutting two 5" x 7" 300gsm smooth cardstock panels,
scoring the "top back" at 3/4" then adhering the top panels together.
I printed off an extra large flower and if you look closely,
you will be able to see the subtle dimension it adds to the card.

Some days you need to do some "scissor therapy".
Although my hands were hurting, I fussy cut a large flower to go on the front of each of my four cards and it felt good to see them slightly curled in readiness for gluing.  I went around the edges of each flower with my Memento Tuxedo Black Ink dual tip marker, so that no white edges were visible.


And here is a pic of the card I mentioned earlier, the image is mirrored,
then rotated and the same sentiment used.

I made another card by rotating the original image
to the right and added a different sentiment.

~~~*~~~*~~~
INGREDIENTS
digital stamp set from Beccy's Place store
“For you” sentiment – from the Geums digital stamp set – no longer available in Beccy’s store but projects shared on the blog can be found HERE
“With love” sentiment – from the Magnolias digital stamp set – no longer available in Beccy’s store but projects shared on the blog can be found HERE
White textured cardstock - American Crafts
Apricot Weave cardstock - Kaisercraft
300gms smooth white cardstock - for card base
Helmar Acid Free Professional Glue -
liquid adhesive - to create top fold of card base
Helmar 450 Quick Dry -
liquid adhesive - to secure all the layers in place
Perfect Layers Ruler

~~~*~~~*~~~
I have entered my card in the July Challenge at Beccy's Place Challenges

For you . . .

Today I had some fun making some 5" x 7" cards
using a digital stamp from the Beccy's Place Store,
digital sentiments, also from Beccy's Place and
combined them with some fussy cutting and layering.


I printed the image panel on white textured cardstock, trimmed to size, matted with Apricot Weave cardstock, trimmed to 1/16" border using a Perfect Layers Ruler, adhered to a 5" x 7" cardstock panel, then adhered the panel to a top folding card base.
I made the card base by cutting two 5" x 7" 300gsm smooth cardstock panels,
scoring the "top back" at 3/4" then adhering the top panels together.
I printed off an extra large flower and if you look closely,
you will be able to see the subtle dimension it adds to the card.

Some days you need to do some "scissor therapy".
Although my hands were hurting, I fussy cut a large flower to go on the front of each of my four cards and it felt good to see them slightly curled in readiness for gluing.  I went around the edges of each flower with my Memento Tuxedo Black Ink dual tip marker, so that no white edges were visible.


I made another card using the same sentiment
and rotating the image.

I mirrored the image and made another card
using a different sentiment. 

~~~*~~~*~~~
INGREDIENTS
digital stamp set from Beccy's Place store
“For you” sentiment – from the Geums digital stamp set – no longer available in Beccy’s store but projects shared on the blog can be found HERE
“With love” sentiment – from the Magnolias digital stamp set – no longer available in Beccy’s store but projects shared on the blog can be found HERE
White textured cardstock - American Crafts
Apricot Weave cardstock - Kaisercraft
300gms smooth white cardstock - for card base
Helmar Acid Free Professional Glue -
liquid adhesive - to create top fold of card base
Helmar 450 Quick Dry -
liquid adhesive - to secure all the layers in place
Perfect Layers Ruler

~~~*~~~*~~~
I have entered my card in the July Challenge at Beccy's Place Challenges